Caramelized apple upside-down cake

Photo Sep 21, 8 20 47 PM

For some, pumpkin spice everything may be all the rage for those fall months when leaves spin slow to the ground and we shake out the coats and scarves so hastily hidden away with summer’s arrival.  But before flavored syrups and the facility of canned pumpkin, another fruit reigned over autumn: the apple.  A New England native, the apple is an automatic October symbol for me.  I think every elementary school student in the area has a field trip to a local orchard.  My town hosts at least five apple picking locations, each vying for some title of prowess – the best cider !  Apple cider doughnuts ! 10 different apple varieties !  Hay rides ! Pick your own ! It’s a glorious, fall-hued chaos that absolutely epitomizes the start of cooler weather, shorter days, and (perhaps most importantly) the baking season.

IMG_8059

Recently, apple pies were made and sold in the center of town and listening to everyone talk about the crust and the filling and the spices and the apples made me ALMOST want to eat pie.

But then I remembered.

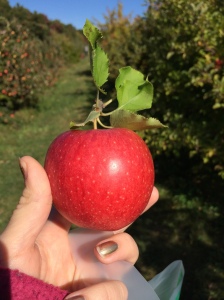
I don’t really like apple pie (a phrase not to be uttered in a town that thrives on apple consumption).  In fact, I really just like apples straight up and down: plucked from the tree, polished on my pants, and devoured with an excellent crunch and the occasional spatter.

IMG_8057

So what to do with this bounty of fruit so often relegated to pie filling ?  Oddly enough, the answer came from France, and more precisely from my home-away-from-home in the heart of Bourgogne.  During one of many Dijon visits, my friend’s mother brought out a gâteau aux pommes.  A “simple, family recipe – nothing special” with caramelized apples and a buttery cake that melts in your mouth.  Simple ?  Nothing special ?  Au contraire !  It looks and tastes both classy and purely of apples, as the ingredients can’t hide behind the spices of cinnamon and nutmeg so often paired with American desserts.  This upside-down caramel apple cake relies on sweet apples, butter, and sugar to create a winning dessert that looks chic but is easy to craft.

When I asked Brigitte if I could use her recipe, she sent me a scanned, handwritten version that included instructions such as “carameliser le moule” – caramelize the cake pan.  How…how does one do that ?  How does one even make a caramel, exactly ? As such, I have gone through and provided my “Americanized” version of the quantities and instructions.  While somewhat capricious, I have yet to entirely ruin this cake (and it’s becoming somewhat ubiquitous in my repertoire of apple-based dishes).  Head to an orchard and pick (or pick up) some Macoun, Gala, or Fuji apples and try your hand at this French family “gâteau.”

Ingredients (for the cake):

3-4 medium apples (Use a firm fleshed variety – no McIntosh !)
1/2 stick butter (+ 1 tbsp for the pan)
1 cup flour
2/3 cup granulated sugar
1 tsp vanilla
1 egg
1 1/2 tsp baking powder
2 tablespoons milk (more as needed)

For the caramel:

You can use a 1:3 ratio of water to sugar – I think I used 1/4 cup water to 3/4 cup sugar but any incarnation of this ratio is fine – if you have apples that are less sweet, use more sugar but you really only need enough to cover the bottom of a 9-inch cake pan.

Directions:

Peel and cut the apple into thin slices. Set aside – do not season with lemon thought you may be tempted to do so !  It is okay if they brown a little during the cake preparation process.

Liberally butter the interior of a 9 inch cake pan and set aside.  I place the pan on the stovetop over a warm eye to keep the caramel from hardening somewhat, but you do not need to do this.

Photo Sep 21, 7 02 33 PM

“Caramelize the cake pan” – yes, the infamous step. I interpret this as making caramel in a pan and pouring it into the cake mould.  Yes, we are going to make a wet caramel and no, don’t panic.

Put the sugar and the water in a pot on medium high heat.  Stir initially to incorporate the sugar into the water but once mixed, just leave it alone on the eye. Let it bubble until it turns a nice deep caramel color – you will see the sugary liquid change from clear, to a light brown, to an amber tone. Take it off the heat and carefully pour the hot caramel into your warm cake pan.  Be sure to cover the entire bottom of the pan (swirl as necessary).

Photo Sep 21, 7 01 34 PM

Photo Sep 21, 7 03 53 PM

Arrange the apple slices in the caramel and be careful not to burn yourself !  The caramel may look pretty, but it is essentially molten sugar.  Your skin will not like it.  I like to place the apples in an attractive pattern but you do not need to take the time to do this – it’s your call.  Be sure to evenly place the apples around the mould.

Photo Sep 21, 7 06 40 PM

Once the apples are arranged, mix up the cake batter.  Soften your butter and whip it until light and fluffy.  Add the sugar and beat for 1 minute.  Crack the egg into the batter, pour in the vanilla, and mix again until smooth.  In a separate bowl, combine the flour and the baking powder.  Slowly add the flour mixture to the butter batter and mix until smooth – add the milk to thin the batter to a spreadable consistency.  Depending on the day and the temperature of the butter, I add more or less milk to the batter – start with 2 tablespoons and continue as necessary.

Photo Sep 21, 7 01 30 PM

Photo Sep 21, 7 01 53 PM

Photo Sep 21, 7 02 56 PM

Pour the batter over the apples and use a spatula to smooth the top of the cake.  Be sure to cover all of the apples !

Photo Sep 21, 7 11 42 PM

Bake for 30 to 35 minutes at 325F.  (Sometimes, I get impatient and increase the temperature to 350F…shh, don’t tell).

Photo Sep 21, 8 09 50 PM

Once the top of the cake is a nice golden brown, remove from the oven.  It is a dense cake – I usually touch the top to check for a little spring, but the cake is done when the middle is no longer jiggly.

Let the cake cool slightly – 10 to 15 minutes – before turning it out onto a plate.  This step is tricky – start by running a knife around the edges of the cake pan.  Then, place a plate over top of the cake pan.  Using oven mitts, in one movement flip the cake onto the plate.  Tap the bottom of the pan and slowly lift it up.  Don’t panic if a few apples have stuck to the pan – just put them back into place. As Julia Child (or perhaps Meryl Streep) said, “When you’re alone in the kitchen – who’s to see ?”

Photo Sep 21, 8 14 39 PMPhoto Sep 21, 8 15 14 PM

Serve warm or cool as dessert, a tea cake, or even (in my house) as breakfast !  Add a scoop of vanilla ice cream for an extra touch. Bon appétit ! 🙂

Photo Sep 21, 8 20 27 PM


Categories: Uncategorized | Tags: , , , , , | Leave a comment

White Chocolate Chip Pecan Cookies

IMG_7472

With Labor Day on its way out the door and schoolchildren taking its place, classic snacks are on the brain.  Parents in this modern age are determined to nourish their offspring with “healthy snack” – you know, those that crunch like carrots and don’t contain trans fats, packaging, or any other frivolities.

I’m not saying throw away dreams of good calories and vitamins abound…but when I came home from school as the leaves turned brown, I wanted a cookie.  Yes, I was “that kid.”

The chocolate chip cookie dipped in milk is classic and (taking a hint from the many clothing advertisements cropping up this season…) classic never goes out of style. As such, I admit to having cookie brain lately…where at many moments during the day, I crave a cookie.  The presence or absence of a cookie wreaks havoc on emotions – just take a look at cookie monster ! Happiness and sadness hinge upon the presence of one, buttery morsel lying at the bottom of the jar.

Some kind of goodie clearly had to be made…so I landed upon a white chocolate chip pecan cookie. Soft and chewy with a little burst of spice from time to time, these treats are perfect for that 2pm lull when coffee calls and you seek an energy burst.  Or when you get home off the train and can’t yet imagine dinner. Even breakfast (if you throw caution to the wind !) justifies a nibble.

IMG_7471

Now, I’ll admit:  I like white chocolate BUT I use it to appease those who can’t sleep at night after having eaten “real” chocolate…as a result, I stirred in a handful of semi-sweet chips to the recipe at the end…as I don’t have any problem snoozing after cookie consumption.

Whether you suffer from cookie brain or not, this spin on the classic chocolate chip delight is sure to leave you (or your children) grinning.

Ingredients: 

1 cup (2 sticks) butter, softened
1 cup packed brown sugar
1/2 cup white sugar
2 eggs
2 tsp vanilla
2 1/4 cups flour
1 tsp baking soda
Pinch salt
1/2 tsp cinnamon
1/8 tsp allspice
1/8 tsp nutmeg
1 cup chopped pecans
1 1/2 cups white chocolate chips
1/2 chocolate chips (optional)

Directions:

Preheat oven to 375F. In a large mixing bowl, cream the butter until light and smooth.  You can do this with an electric mixer or by hand.

IMG_7449

Add the white and brown sugar, whipping until lightened in color and almost pillowy.  Add the eggs one by one, mixing well after each addition.  Don’t worry if your batter adopts a strange texture – this often happens if the eggs are not room temperature.  Their chilly, refrigerated state makes the butter cringe.  It is okay – adding the flour will make everyone get along. Toss in the two teaspoons of vanilla and give the mess a whirl.  Be sure to scrape down the sides from time to time – make sure all the butter is getting incorporated into the batter.

IMG_7450

IMG_7452

IMG_7453

In a separate bowl, mix together the flour, baking soda, salt, and spices.  I enjoy the snickerdoodle-esque (quite the adjective) quality cinnamon, nutmeg, and allspice bring to these cookies.  Makes me feel a little like Remy in Ratatouille.  It offsets the pecan nicely – very much a fall flavor.  If, however, you prefer the more standard flavor profile, you can skip them and no harm will come to the cookies.

IMG_7458

Slowly add the flour mixture in to the batter, being careful not to mix too quickly (or else flour will be everywhere in the kitchen – EVERYWHERE.  Like this). Once combined, stir in the pecans and the chocolate chips.  Taste.  Whatever anyone ever told you about not eating the batter is to be ignored.

IMG_7461

IMG_7460

IMG_7463

IMG_7465

On a baking sheet (which you may or may not line with parchment paper – it’s up to you), drop the cookies by tablespoonful.  I like to shape them into rounds but it’s definitely not an exact science…they will spread out a bit so be sure to leave about an inch to two inches of space between each bit of dough.

IMG_7467

Bake for 10-15 minutes but be sure to use your nose: once you can smell the cookies, chances are good that they are done. I prefer soft bites but if you like crispy cookies, by all means cook them longer.

Once out of the oven, remove them from the baking sheet and let them cool on a wire rack…but remember – warm, just-out-of-the-oven cookies are the best, so you should probably eat one or two.  With some milk.  Just a “serving suggestion”. 🙂

IMG_7471

As for the rest, save them for snacking and relieving cookie brain symptoms !  Bon appétit !

Categories: Uncategorized | Tags: , , , , , , , | Leave a comment

Croque-madames with Swiss Cheese and Dijon Mustard

Every once in awhile, someone will comment that they, “haven’t seen any new recipes on the food blog in awhile” – and I sheepishly look anywhere but in their eyes when I explain that I let scratchbatch slip off to the sidelines while I did “more important things.”  I’ve been cooking like the rest of us, but finding the moments to record those kitchen expeditions somehow became increasingly difficult.

In the time that’s elapsed since I discussed scones in all their glory, I have written many papers, earned a degree, lived abroad, and returned home.  With time on my side and a desire to jump back into my little culinary universe, I thought a second attempt to rejoin the blogosphere might not be such a bad idea.  To get back in the groove, I’ve got an easy and deliciously messy sandwich suggestion that might just redefine your concept of “breakfast for dinner.”  I present to you:  the croque (et oui, with a French name, it sells better !) or upscale, reinvented grilled cheese.

Doesn't look like a bonnet to me...

Perhaps this is a surprising choice – why make something that might equate diner food ?  The answer is fairly simple: it’s easy and you almost always have the ingredients hiding in the fridge to make it.  The other evening, I was sitting with the living room with my parents.  My mom looks up from her computer, pouts a little, and starts to brainstorm what to have for dinner.  A certain paresse has prevented any new groceries from entering the premises and creativity will therefore play a large role in whatever dish we dream up to devour.  Mom whines, “I have all this cheese just sitting in the fridge and I don’t know what to do with it !   Hey, maybe we can have grilled cheese and tomato soup for dinner!”

I wasn’t impressed or tempted by the idea of hot soup on a hot night.  Voicing my opinion, we somehow started discussing the croque madames we’d eaten in France. I thought about it for a moment…when Mom declared, “If you can make it, that would be great !” Dad, behind two pairs of glasses, nodded his consent.

So off to the kitchen I went to make this classic, French-inspired snack.  Any bar/café in France will likely have a croque monsieur or a croque madame on their menu.  It’s standard quick eats, a sort of Frenchie fast-food that may have gained it’s popularity in the Paris of the late 40’s. The essentials stand as such: thick slices of bread, a little béchamel sauce, ham, and melted cheese.  The madame, in somewhat Gallic humor, is topped off with an egg (so named for the hat styles fashionable at the time…though I could think of other reasons…) while the monsieur touts but ham and cheese.

Usually, this sandwich is made with gruyere or emmenthal cheese, but those are less likely to be in an American refrigerator.  I used pecorino/parmesan, swiss, and provolone to great effect.  Don’t let the béchamel scare you off – it’s very easy to make and takes little time.  Put on the Amélie soundtrack, open a red wine, and whip up these fancy (and filling), French-inspired sandwiches.

The sauce: 

– 1 1/2 tbsp butter (unsalted or salted is fine)
– 1 1/2 tbsp flour
– 1 cup milk
– 3/4 cup grated cheese (I used parmesan and a little swiss)
– Salt and pepper to taste
– A few sprinkles of nutmeg

NB: Have the milk and cheese at the ready before beginning the sauce.

In a medium-sized saucepan, melt the butter over medium-high heat.

Melted butter

Add the flour and cook, whisking, until smooth and lightly browned. It’s important to incorporate the flour and the butter; the flour will be the thickening agent for the béchamel sauce. You also want it to change color (becoming somewhat golden in hue) in order to remove some of the floury flavor. This will all happen fairly quickly, so don’t dawdle and keep mixing !

Photo Jun 24, 7 11 04 PM

Photo Jun 24, 7 11 25 PM

Pour in the milk, continuing to mix constantly. Let the mixture come to a boil before reducing the heat until thickened. I usually continue to whisk and before my sauce has begun to fervently bubble, it has adopted the viscosity of molasses (desired).

Photo Jun 24, 7 12 53 PM

Add the cheese by handfuls, mixing until smooth and melted. Taste – if you want more cheese, add it now.

Photo Jun 24, 7 15 52 PM

Season with a little salt, cracked pepper, and nutmeg. Be sure to sample before setting aside.

Photo Jun 24, 7 17 10 PM

Photo Jun 24, 7 23 56 PM

The sandwich:

– 6 slices of bread, toasted (I used a multigrain bread but anything that isn’t Wonder Bread should be fine…)
– Coarse-grain Dijon mustard (for spreading)
– 6 slices ham (any cold cut could substitute well)
– 6 slices swiss or provolone
– 3 large eggs

Heat broiler. On a large baking sheet (you may cover with parchment paper if desired – I did not, and had no trouble removing my toasts), place the 6 slices of toast. Spread a generous spoonful of mustard on each slice of bread. If mustard isn’t your favorite condiment, butter is a likely substitute…but really, trust me on the mustard front. It’s delicious). Top each toast with a slice of ham and a slice of cheese. We were cleaning out the fridge, so I did three with swiss and three with provolone. It was so good, I might always do it like that…but you may choose whatever cheese cocktail you like.

Photo Jun 24, 7 28 49 PM

Photo Jun 24, 7 32 25 PM

Top each toast with a generous dollop of béchamel sauce. Place tray in oven for 1-3 minutes or until the cheese sauce is bubbling and evenly browned. Please note that it is wise to cover the toasts as completely as possible so as to prevent them from burning when facing the heat of the broiler.

Photo Jun 24, 7 38 10 PM

Photo Jun 24, 7 53 37 PM

Remove from oven and get ready to fry some eggs.

Heat butter in a skillet over medium heat. Add salt and pepper to melted butter. Once the pan is hot (I test this by flicking a bit of water at the pan. If it sputters madly, it’s ready to go), crack an egg into the pan. It will cook fast – I like to run the edge of the flipper under the egg about midway through the cooking process to make sure it doesn’t stick to the bottom of the pan. Cook until the whites are set but the yolk is still runny…maybe 3 minutes in the pan. If you prefer the over-easy approach, go for it.

Photo Jun 24, 7 57 13 PM

Assembly:

I placed ours on a bed of greens (like arugula) but one may just as easily leave those out. Take one toast and place it on the plate. Top it with a second toast. Just as the egg is cooked, place it on top of the sandwich and devour right away !

Photo Jun 24, 7 58 27 PM

The best part is watching the yolk drip down over the combination of melted cheese, bread, and béchamel. Bon appetite !

Photo Jun 24, 8 04 09 PM

Categories: English | Tags: , , , , , | Leave a comment

Chocolate Chunk Scones with Raspberry Swirl

IMG_0701

7:30am.  The alarm goes off.  “BEEP BEEP BEEP BEEP” followed by “bebebeBEEP bebebeBEEP bebebeBEEP bebebebebebeBEEEEEEP” and then the humming of my roommate’s generic iphone guitar strum and then, finally my little dumbphone’s contribution to the matinal symphony: BUZZZZZ…BUZZZZZ…BUZZZZZ….(love meeeee, says the Envy2 LOVE MEEEEEEE).  Banging these devices any number of times, I open my eyes and proceed to poke the top mattress of our bunk bed. “wakey wakeyyy meowww…” poke poke poke.

Roommate is not nearly as amused by the morning cacophony as I am.  I’m greeted with a groan. “Noooooooooo” goes the grumpy cat.

Mornings are rough.

As she finally scrambled down from her perch on high, I began the process of getting up out of bed and making the most exciting decision of the morning: breakfast !

It’s Saturday and I don’t want cereal.  Or a bagel.  Toast is a definite no.  Don’t even think about oatmeal.  Definitely not having yogurt.

I want a real, old-time, well-prepared, rejoice-in-the-fact-it’s-Saturday breakfast. That means baked goods AND, upon examining the dwindling supply of groceries…something creative.  I saw chocolate chunks.  I saw baking goods.  I had some raspberry jam in the fridge.  Put it all together and…scones had to be the answer.  After a little googling, I settled on this recipe from The Joy of Baking, one of my favorite baking websites.  I’ve added some spices and substituted jam for fresh berries (the grand scheme all along, of course), but the recipe is mostly intact and, after having devoured two in rapid succession, provides a delicious breakfast dish.  I paired it with some cheesy grits and a fried egg, but all the loving these scones need is a cup of something warm and an open weekend morning…that doesn’t need to begin as early as mine did.  Happy nibbling !

IMG_0708

Ingredients:

2 cups flour
1/3 cup sugar
1 tsp baking powder
1/2 tsp baking soda
1/4 tsp salt (if using salted butter, skip added salt)
6 tbsp butter, cold and chopped
1/2 cup chocolate chunks (more are fine 🙂 )
1/2 cup plain greek yogurt
4 tbsp raspberry jam
1 tsp vanilla
1 egg, beaten
Dash of cinnamon
Dash of nutmeg

IMG_0653

In a large bowl, combine the sugar, flour, salt, baking soda, baking powder and spices and stir to incorporate.  I really enjoy cinnamon and nutmeg with flavors like chocolate, but adding these is not obligatory in any fashion.

IMG_0657

Add the cold butter to the flour.  Using a pastry blender (or your hands – either works fine), work the butter into the flour.  This will take a little bit of time, but be patient.  If you are using your hands, make sure you start with really cold butter.  The warmth of your hands will affect how much flour the butter is able to “absorb,” so to speak.  If the butter absorbs too much flour, the consistency of the final product will be slightly off…no real harm done (whew !) but if you want a “true” scone consistency, don’t work that buttah too much, honey.   The final product should have the texture of crumble – if you squish it, it will keep a basic shape, but upon touching it again will crumble into DUST.  POOF !

IMG_0666 IMG_0669

To this mixture, add the chocolate chunks.  Give them a good stir to coat them in the crumble combination.  Once coated, make a chasm (that word has such presence…I definitely need a deep voice to deliver it with full force) in the flour mixture.

IMG_0677

In another bowl, combine the yogurt, egg, and vanilla.  Whisk well to combine.

IMG_0672

Pour the egg mixture into the hole made in the flour.  Stir with a fork to incorporate, somewhat.  Add the jam and stir until the dough just comes together – the mixture will be thick – that’s okay.  You don’t want to mix it too much or the dough will be chewy and tough.

IMG_0680

IMG_0683

Once the batter just holds together, turn it out onto a well-floured surface.   Form the dough into a circle and cut the circle into triangles to place upon a prepared baking sheet.

IMG_0687 IMG_0691

IMG_0693 IMG_0692 IMG_0694

Cook for about 20 minutes or until golden brown.  Mine are a little more than golden brown BECAUSE my broiler is a little wonky.  If desired, you may dust the scones with powdered sugar and broil them for about 10 seconds to give them a nice crust.  Mine stayed in a touch too long but are none the worse for wear (or taste) !

IMG_0705

Enjoy with a cup of java or tea or simply with your breakfast.  Bon appétit ! 🙂

Categories: English, Uncategorized | Tags: , , , , , , , , | Leave a comment

Plum Tart with Greek Yogurt

1239177_10151956984254402_66767571_o

Fall is in full swing and in this swanky apartment we’re eating…PLUMS !

I know, I know…plums ?  Aren’t you supposed to be making pumpkin-themed everything ?

Yes yes, plums !  Pumpkin is so passé* – everyone is devouring pumpkin goods.  Time to give those plums a little lovin’ !  Perhaps this post of positively pleasant “P” sounds presents a perfect place for plum pizzazz !

IMG_0614
In any case, it is true that plum season extends into early fall – October – and I am, for the first time, taking advantage of this fact.  I used to dislike plums.  Well, perhaps dislike isn’t the proper term.  Ignore may be a better one.  Plums were, in a word, strange. Why ?  Because they morph into prunes, that’s why.  I couldn’t bring myself to eat either fruit.  It was strange, therefore, when I walked into Trader Joe’s, saw a “basket” of plums looking for a home, felt spontaneous and snatched them up and POW a memory popped in my head:  for my birthday, while in France forever ago, my host dad, Pierre, made me a birthday dessert. Considering my host family and I were not particularly chummy, I was very touched by the gesture.  A beautiful, rustic plum tart sat in front of me, paired with a book about Dijon.  I can’t believe I’d buried that memory so deep, and it took a basket of unassuming plums to trigger it.

So then I had it.  The IDEA.  I would make a plum tart for my birthday…hence, here is my birthday “cake” thrown together with little time to spare before a 20s’-themed bash !  As you can tell, from the top picture, it was devoured in record time.  It’s a quick fix (if you buy your crust, and I did…I know, tsk tsk) that is pleasantly tart and lightly spiced.  This recipe uses a Greek yogurt “custard” topping, but I think, were I to remake it (and there are still a few dusty plums kicking around my cuisine…) I would skip the cream and make the tarte tout simplement avec des prunes.

I used the recipe from Mary Anna Esposita, the woman who taught me more about tomatoes via her great cooking show “Ciao Italia” than I think I needed to know as an 8 year-old.

Here’s the original recipe; the one noted below is with my adjustments.
Ingredients :
7 plums, cut into slices
Juice of 1 lemon
1/4 cup sugar
1/2 tsp cinnamon
1/4 tsp cloves
1/4 tsp nutmeg
Sprinkle ginger
2 egg yolks
3/4 cup greek yogurt (plain)
3 tbsp additional sugar
Preheat the oven to 400F.  If you are making your own crust – you are fabulous and better than me this go around.  Prepare the crust and place it in a greased tart pan (or pie dish, or quiche pan – whatever you have will probably do).  I’d give the crust a little toast before placing the plums, but it is not required and the tart will not combust or fail to cook in time if you don’t.
Slice the plums into fairly thin sections – I made mine into little segments (like a fan, kind of) in order to make the tart look nice.  You are welcome to cut the plums in a less careful manner and throw them in the pan.  Taste will not be affected.  You can’t judge a book by its cover.  Right ?  Right.
IMG_0609
Arrange the plums in concentric circles (if desired) in the bottom of the pie pan.  I started in the “middle” and worked my way out.
IMG_0611
IMG_0616
In a separate bowl, mix together the sugar and the spices, stirring well to combine.
IMG_0618
Dust the plums with the sugar mixture – don’t be afraid to really bury them !  As the plums cook and release water, it will mix with the sugar combination to make this wonderful caramel-like substance at the bottom of the tart.  It’s delicious with ice cream.  Yummmmmm.  Top with the juice of the lemon – I just gave that citrus fruit a good squeeze directly overtop the plum and sugar combination.
IMG_0620
Place this in the oven until the plums are soft – about 10 minutes – then remove from the oven.  You are WELCOME to just eat this as your tart and not continue.  It looks so good, I have half a mind to try it like this with my remaining plums….
IMG_0624
In another bowl, whisk together the 3 tbsp of sugar, egg yolks, and yogurt.  Pour this mixture over the tart, being sure to work from the inside out and try to evenly distribute the custard.  Place the tart back into the oven and cook for about 10 more minutes or until the custard has set- you should be able to touch the top and pull a little of the custard out on your finger.  It’s sort of in a semi-solid state.
IMG_0625
Let the tart cool a little before serving to your hungry party guests !
Bon appétit ! 🙂
*I hold nothing against pumpkin goods…in fact, I’ve been cooking them a lot.  I just wanted to be DIFFERENT.
Categories: English | Tags: , , , , , , , , , , , , | 2 Comments

Banana Bread

IMG_0557

What do little Italian men love most of all ?

Really though, what do you think ?

Perfume ?   Pasta ?  Wine…breadsticks…music…candlelight…Milan….

Well, no.  I hate to break it to you, but the real way to the heart of a wee italian man is with BANANA BREAD.  Yes, Petri, this one’s for you.

For the past month and a half (give or take), we’ve had the pleasure of hosting the famous Petri Dish in our apartment.  I arrived in late August, mentally preparing myself for a semester of ESTROGEN when POP !  Out of nowhere this charismatic, loud, and endearing italiano appeared on the scene, fully moved in (yes, toothbrush and all).  Skeptical at first (a who living in my what ?!), Petri quickly grew on me.  He is a walking party and always greets me with a “Hello Lizzzzzz, how are you ?” spoken as if my answer is actually important (Petri, if it isn’t important, don’t tell me.  I want to continue romanticising you).

It is slightly intimidating, living with an italian, because they cook so well.  Sometimes, I would come home from class and the apartment would smell divine – Petri was making homemade vegetable broth, a smell I associate with home.  (To my credit, I insisted on bay leaf usage.  This little american lends a hand every now and then).  I watched him make pasta, pasta, pasta, risotto, pasta, pasta and tiramisù.  Being the fellow chef in the kitchen, it was fun to have some cooking banter flying about this college setting.

At one point, Petri revealed his love (obsession ?) with banana bread, which surprised me.  Often, Europeans are “not convinced” of putting fruits/vegetables in quickbreads (carrots, zukes, sweet potato, banana, pumpkin…) as it just seems contrary to tradition.  Or something.

I decided that before he left, I’d make him banana bread.  I think it’s safe to say my bread passed muster.  Pietro, we’re going to miss you !  Here’s the recipe I used (and perhaps you’ll woo an italian, too) !

Petri’s Banana Bread

1 1/4 cups flour
1 1/2 cups sugar
3 ripe bananas
2 eggs
1/2 cup vegetable oil
2 tbsp cream (or buttermilk, or greek yogurt, or sour cream)
1 tsp baking soda
1 tsp vanilla
1/2 tsp salt
Dash cinnamon/nutmeg/cloves.  Just a sprinkle.

Preheat oven to 350F.  Grease or line the bottom of a standard loaf pan with parchment paper.  Set aside.  I prepared two but only used one (not enough time to cook a double batch !)

IMG_0530

Peel the bananas and place them in a large bowl.  Mash with a fork (or a masher) until nice and squishy – it will look rather disturbing as a texture – you want the lumps no bigger than chickpeas.

IMG_0532 IMG_0533 IMG_0534

Add the sugar and the oil to the mashed bananas, whisking to combine.  I will admit, the batter for banana bread is probably the most disgusting thing you’ll ever see.  Persevere, because it tastes awesome when cooked.

IMG_0538

Add the eggs and vanilla, whisking again to incorporate.

IMG_0537

In a separate bowl, combine the flour, baking soda, salt, and spices.  Stir together to combine – you wouldn’t want random patches of baking soda, would you ?  So give it a good stir.

IMG_0540

Add the flour mixture and the cream (or dairy product of choice…) and mix well – the batter shouldn’t have any flour clumps hiding about.

IMG_0544 IMG_0545

Pour into the prepared loaf pan and bake for 1h20 minutes – it takes a long time to cook, but you’ll know it’s almost done when the top splits.  Let cool 10 minutes before removing from the loaf pan.

IMG_0553

Feed to your favorite [italian] housemate(s) and buon appetito !  🙂

IMG_0556

Categories: English | Tags: , , , , | Leave a comment

Chewy Chocolate Chip Cookies

IMG_0390

Well, it happened.  I’m a senior, wading through my final year of university, and joys of syllabus week are, alas, but wee specks in the my rearview mirror.  Homework, late nights, and crunchy leaves pretty much mean that I should be  putting “ma main à la pâte” in a figurative sense…however all I seem to do is literally put my hand to the dough and whip up the fall classic – chocolate chip cookies.

I think I learned how to cook making these cookies.  My mom would let me measure the chocolate chips.  Well, I don’t know if she let me, or if I just did it…because let’s face it, who doesn’t want to sample those delicious morsels of cacao bean delight ?  Also, a five-year-old can’t really mess up that part of the cookie making…unless she eats too many chips…whoops.

Once I’d mastered that, I could  pack down the brown sugar…add the white sugar…even (eventually) measuring out enough flour (“Liz, fill it to the top of the P” – we had Pyrex 2-cup measuring cups, and I suppose the top of the P was approximately 2 1/4 cups of flour…) for the recipe.  We had (and still have) this rickety metal stepladder on which I’d place the ingredients I’d measured…and then I’d (of course) climb on it to watch all the ingredients go swirling, whirling, twirling around in the MixMaster (Kitchenaid, for those those versed in proper kitchen vocab).  The best part came when I could sample the dough.

I don’t think anything tops cookie dough batter.  I always wanted to just nibble it raw…but mom would chide, “No Liz !  There are raw eggs in there !  You could get sick !”

She is probably right, but when I make it all on my lonesome, I’m not going to lie, I take a hearty nibble-nom-nom out of whatever “pâte” I’ve put my “main” in.

This recipe is a little bit different than your back-of-the-chocolate-chip-bag variation BUT I think it’s the secret to the perfectly balanced SUPERCOOKIE : add molasses.  It sounds surprising, however the molasses renders the cookie soft and “nuanced,” to borrow some wine-bottle diction.  Just trust me, expert choco-chip cookie master since the age of 5.  Get out of class, whip these up, and forget about your application woes while munching on this old-school afternoon snack.  🙂

Ingredients :

2 1/4 cups flour
1 tsp baking soda
1/4 tsp cinnamon
1/2 tsp salt (only add if using unsalted butter)
1 cup (2 sticks) butter; softened
1 cup brown sugar; packed
1/4 cup white sugar
1/4 cup molasses
2 eggs
2 tsp vanilla
1 bag (12 oz approx.) chocolate chips (you can feel this one out – if you want less, just add bit by bit)

Start by creaming the butter in a large mixing bowl.  If you have an electric mixer, go ahead and fire it up.  If not, get ready to whisk like it’s your job.  You want to make sure the butter is nice and uniform so that the sugar will mix in evenly.  Also, the softening of the butter allows more sugar/ingredients to “dissolve” into the fat, making for a smoother, creamier batter.  (“Liz, soften the butter” “Mom, how ?”  “In the microwave.”  “Mom, what if I melted some of it…”)

IMG_0369

Fun fact courtesy of the padre: if your butter didn’t get soft enough, wrap a warm towel around the mixing bowl.  This will help the butter to soften – it’s particularly effective with a metal mixing vessel.

When the butter is light and the whisk/beaters make pretty swirly shapes in the mixture, begin to add the brown sugar.  Beat until the mixture lightens in color.  Add the white sugar and the molasses, beating again until lightened in color.  It should look like very grainy buttercream frosting.  Scrape down the side with a spatula, and mix once again.  (“Mom, can I taste it?”  “Liz, it’s just sugar and butter !  You already know what that tastes like !”)

IMG_0367


IMG_0371

Add the vanilla to the eggs, dropping them in one by one (“Liz, I never add the eggs one by one, it takes too long. I just throw them in there with the vanilla”) beating after each addition.  You can skip this step, as my mom always does, but I like to beat them in one by one – I get to personally make sure each one gets whipped into shape.

IMG_0376

IMG_0378

In a separate bowl, combine the remaining dry ingredients – flour, baking soda, salt, and cinnamon – stirring well to incorporate evenly.  Carefully add this to the butter mixture (“Liz, don’t add it so fast !  You’re going to make a mess !”), reducing the mixer speed or using a spatula to combine.  If you go too quickly, the flour will explode in your face and probably make you sneeze.  It’s not worth it.  Take your time AND as an added bonus, play this game :  How little flour/mess can you make in the kitchen ?  It’a really fun game – and worthwhile, too !  Why ?  Because it’s less to clean up later, silly !  Oh, I am brilliant at times.  🙂

IMG_0379

IMG_0382

Finally, add the chocolate chips and stir to combine.

IMG_0386

Mommmmm, can I taste it now ??”

Yes, yes yes yes.  Take a nice good sample of your cookie dough, for this is, arguably, the best part.

On a large cookie sheet, drop the batter by tablespoons full (“I never bother with spoons, I just sort of eyeball it and use my fingers”) and shape into balls.  I use a big spoon and my fingers and just try to make sure each cookies is approximately the same size.  I really wouldn’t fuss over the size of your balls (“…”) and just have fun plopping misshapen cookie blobs on the baking sheet.  Make sure they are spaced about 2 inches apart from each other, as these cookies like to spread out.

IMG_0387

Cook for about 12 minutes per sheet, or until a nice golden brown.  “Light and gooey and yummy and chewy,” as my sibling and I would chant. We take cookies seriously in this household….and this apt.

IMG_0389

Remove and let cool on a rack (if you can wait that long) or place directly on a plate and devour immediately !

IMG_0395

Happy munching, and bon appétit ! 🙂

Categories: English | Tags: , , , , , , , | Leave a comment

Three-layer Peach, Raspberry and Brown Sugar Pavlova

IMG_0461

One would have no idea summer is winding down here in D.C.  The heat and humidity loping through the campus turn us all lethargic and in need of a dunk in the ocean.  Alas, schoolwork and projects beckon, and rather than exercise my need for R&R, I’ve settled on food as an escape.

Not entirely surprising, is it ?

In any case, PEACHES have been my ambroisia of oubli, and with a weekly farmer’s market, they aren’t difficult to procure.  Most recently, I re-made Nora Ephron’s Peach Pie (click the link for the recipe), and it disappeared in a day.  This is the problem with having roommates: as the cook, you want to share !  But BAMPOOFPOW – it’s all gone !  It’s definitely “bittersweet,” shall we say.  In any case, before I left my little town, I attended our local peach festival (yes, we have one of those) with a friend of mine.  While picking peaches, I declared that I would make SOMETHING with these gems that wasn’t a peach pie.  This mixed fruit pavlova is the “fruit” of said declaration.

Pavlova is a meringue-based dessert that is very light and fruity.  Because it’s all egg whites, there is no added fat (eg butter/oil), so if you are “reducin’,” as my grandmother would say, it’s a nice choice for dessert.  Each pancake of meringue sits on a bed of whipped cream (you don’t need this part if you’re not partial to chantilly) and cut fruit (such as mixed berries, peaches, nectarines, plums, etc).  Rather like a trifle, this dessert needs to be eaten the night you prepare it, or else it will get soggy.  It’s an excuse to devour an entire treat in one sitting…right ?  And it’s covered in fruit !  Fruit is healthy !

Grab some peaches before the season really ends and whip up (literally) this lesser-known dessert as one final tribute to the groove of summer.

For the meringue :

Confectioners’ sugar (for dusting)
1 cup granulated sugar
1/2 cup packed light brown sugar
1 1/2 tbsp cornstarch
1 1/2 tsp vanilla
2 tsp distillled white vinegar
3/4 cups egg whites (5 to 6 large eggs)

Directions :  Preheat the oven to 275F with rack placed in the middle of the oven.  Line three 8” round cake pans with parchment paper, dusting the sides with confectioners’ sugar.

IMG_0407

Pulse the sugar, brown sugar, and constarch in a food processor until well combined.  You can also whisk these ingredients together if you, like me, are often sans fancy kitchen appliances.

IMG_0399

Stir together the vanilla and white vinegar.  Don’t smell it…you won’t be pleased.

IMG_0400

Beat the egg whites with a pinch of salt using an electric mixer (or your brute strength, however you like) until they hold soft peaks.  Increase the speed to medium-high and add the sugar mixture 1 tbsp at a time.  It doesn’t have to be a perfect tbsp – think of that measurement as a speedbump – as you just don’t want to add the sugar too quickly.

IMG_0403

After all the sugar has been incorporated, beat for 1 minute more.  Add the vinegar mixxture, then beat at high speed until meringue is glossy and holds stuff peaks: about five minutes.  Spoon meringue into pans and smooth the tops.  I used a pastry bag, but this is not at all necessary (unless you feel like a perfectionist).

IMG_0408

IMG_0412

Bake the meringues until they have a crisp crust and feel dry to the touch – about 1 hour.  Meringues may sink while cooling – but have no fear !  It just means more space for berries and cream !

IMG_0415 IMG_0416

Turn oven off, prop door open with a wooden spoon (or ruler tool), and cool the meringues for 1 hour in the oven.  You want to keep them in a dry environment so that they don’t go all soggy…and the oven is the closest thing to the desert one has in a kitchen….except maybe for the brisker, but everyone knows briskers often carry a strange scent after re-crisping one too many boxes of crackers.

IMG_0434

Run a knife around the edges of the cake pans and remove gently.  MERINGUES ARE FRAGILE.  BE CAREFUL.  (But not too careful…because who doesn’t love to mop up the crumbs ?)

For the fruit topping :

2 white peaches
2 golden peaches
1-2 cups raspberries
1 cup blueberries (if desired)
A little liqueur – I like “peche” but cassis, chambord/framboise or a blueberry syrup would be delicious as well.  Do not add sugar to the berries if you use a “berry” sweet liqueur (Brian, that one is for you).

This part is really quite simple:  Peel the peaches (if desired) and cut them into sections.

IMG_0420 IMG_0423

You don’t need to cut them into smaller chunks, but I did simply because it makes the fruit more uniform.  Place into a bowl and add the raspberries and blueberries.  Give it a quick stir and drizzle some liqueur over the top, if desired.

IMG_0429

For the whipped cream:

1 1/3 cups heavy cream
Sugar (just a tablespoon or two will do)
Vanilla – a dash

Whisk until thick, creamy, billowy, delicious, and…well…whipped !  I used an electric mixer and added the sugar just as the cream began to thicken.

IMG_0441

Assembly :

Start by placing one layer of meringue on your cake plate.  Place it flat side down – this will ensure overall stability of the pavlova palace you are about to craft.

IMG_0438

On top of this, spread a nice layer of whipped cream.  Top with berries (I forgot this step !)

IMG_0444

Place the next layer of meringue on top and follow the same pattern : whipped cream followed by fruit.

IMG_0446 IMG_0450

IMG_0455

IMG_0461

Serve very soon after preparation as those meringues won’t last long surrounded by fruits.  It may not be the most elegant dessert, but it is marvelously tasty.

Bon appétit ! 🙂
IMG_0467

Categories: English | Tags: , , , , , , , | 1 Comment

Atelier de Cuisine at the French Cultural Center/af of Boston

photos classe celine 133

I blinked my eyes and the summer drove past before I had a chance to ask for a ride !  Rather rude, though I know hitch-hiking is frowned upon in most places.  I thought Summer might make an exception, but alas – here I am, at the end of August, with but a week of “liberties” left to my name.

I can’t complain though, as these busy months have brought many surprises, including the opportunity to teach my own cooking workshops at the French Cultural Center/Alliance Française of Boston !  Working with students ranging from age 3 to mid-teens, we tackled pain aux raisins, mousse au chocolat, and bread (“pain”), which we (of course) christened as baguettes.  The final results were impressive, and this week’s group was no exception.

Tuesday afternoon, thirteen fabulous “ados” (aka teenagers) gathered in the ballroom of the FCC/af and listened to me (yes, attentively – I only chided Siri once…and since I don’t have Siri on my phone, it really wasn’t a bother at all 🙂  She’s really quite sweet) explain how I started blogging and why I love cooking.  I then divided the group into two teams, pairing each group with a recipe.  Their mission ?  Prepare the recipe, with my guidance, to be published on my blog.

This could have gone so terribly, horribly, wrong.  What if we failed ?  What if they didn’t like it ?  Not to mention dealing with a big goofball (me) in the kitchen…

Atelier cuisine 100

I have never been PROUDER of a group of students.  They spent just over 90 minutes in a hot kitchen working constantly (for the most part…) to make bread and mousse au chocolat.  They separated eggs – some for the first time – without hitch.  They kneaded bread dough.  They asked fantastic questions, like “Why do we knead dough” and “why does bread rise” ?  Rather than just mentally check out, I was delighted to see them all working.  The blog entries posted below are a result of these thirteen ados incredible work – they wrote everything, took and selected all of the photos, and of course, ate the food they made (though I DID help eat the mousse…it was too good to ignore).   Félicitations to the super-chouette ados !  To see their work, either school down or click the hyperlinks above.

GROUP PHOTO

Please note: these recipes and steps are in French as the workshops were “animated” in French only, following the immersion-style teaching guidelines of the alliance française.  If you would like an English translation, that is entirely possible – just let me know.  Bon appétit !

Categories: Uncategorized | Leave a comment

La mousse au chocolat

photos classe celine 153

Quest-que-c’est? C’est du chocolat? C’est de la mousse? Non – c’est de la mousse au chocolat! Et c’est déliceux! C’est comme un nuage de Dieu. C’est assez simple, et si nous pouvons le faire, vous le pouvez aussi.  L’arôme chouette va remplir votre cuisiner et à la fin vous aurez un saladier rempli de dessert incroyable.

Les ingredients:

6 jaunes d’oeuf
6 blancs d’oeuf
6 tbsp de beurre
12 tbsp de sucre
1 1/2 tasses de crème à fouetter
12 oz de chocolat noir
1 1/2 tsp de vanille

Les étapes :

Etape 1:  Dans un casserole, mettez le chocolat noir et le beurre. Faites fondre le chocolat et le beurre au feu doux.

Atelier cuisine 054 Atelier cuisine 058

Etape 2:  Fouettez les jaunes d’oeufs et 6 tbsp de sucre dans un saladier. Utilisez un fouet pour tout incorporer. La couleur devrait être d’un jaune clair.

Atelier cuisine 043photos classe celine 055

Etape 3:  Avec un fouet (ou un batteur électrique), battez la crème pour faire de chantilly.  Laissez la crème fouettée à côté.

Atelier cuisine 077

Etape 4: Dans un autre saladier, battez les blancs d’oeuf en neige. Félicitations as Cassandre d’avoir BEAUCOUP BEAUCOUP fouetté 6 blancs d’oeufs – c’est fatiguant !

Atelier cuisine 068Atelier cuisine 085

Etape 5: Versez le chocolat dans le saladier avec les jaunes d’oeufs et le sucre.  Remuez bien cette combinaison.  Avec une spatule, ajoutez les blancs d’oeuf en neige et remuez bien. Attention de ne pas trop mélanger !  Pour finir, ajoutez doucement la chantilly.

Atelier cuisine 079

Atelier cuisine 083

photos classe celine 078

Etape 6: Mettez la mousse dans le réfrigérateur pendant une heure avant de la manger.  Bon appétit ! 🙂

photos classe celine 151 photos classe celine 152

Categories: Français | Tags: , , , , , , | 1 Comment

Blog at WordPress.com.