Posts Tagged With: Chocolate

Chocolate Chunk Scones with Raspberry Swirl

IMG_0701

7:30am.  The alarm goes off.  “BEEP BEEP BEEP BEEP” followed by “bebebeBEEP bebebeBEEP bebebeBEEP bebebebebebeBEEEEEEP” and then the humming of my roommate’s generic iphone guitar strum and then, finally my little dumbphone’s contribution to the matinal symphony: BUZZZZZ…BUZZZZZ…BUZZZZZ….(love meeeee, says the Envy2 LOVE MEEEEEEE).  Banging these devices any number of times, I open my eyes and proceed to poke the top mattress of our bunk bed. “wakey wakeyyy meowww…” poke poke poke.

Roommate is not nearly as amused by the morning cacophony as I am.  I’m greeted with a groan. “Noooooooooo” goes the grumpy cat.

Mornings are rough.

As she finally scrambled down from her perch on high, I began the process of getting up out of bed and making the most exciting decision of the morning: breakfast !

It’s Saturday and I don’t want cereal.  Or a bagel.  Toast is a definite no.  Don’t even think about oatmeal.  Definitely not having yogurt.

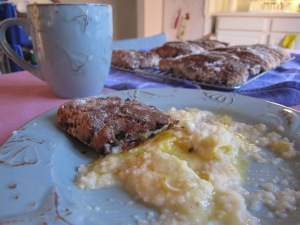
I want a real, old-time, well-prepared, rejoice-in-the-fact-it’s-Saturday breakfast. That means baked goods AND, upon examining the dwindling supply of groceries…something creative.  I saw chocolate chunks.  I saw baking goods.  I had some raspberry jam in the fridge.  Put it all together and…scones had to be the answer.  After a little googling, I settled on this recipe from The Joy of Baking, one of my favorite baking websites.  I’ve added some spices and substituted jam for fresh berries (the grand scheme all along, of course), but the recipe is mostly intact and, after having devoured two in rapid succession, provides a delicious breakfast dish.  I paired it with some cheesy grits and a fried egg, but all the loving these scones need is a cup of something warm and an open weekend morning…that doesn’t need to begin as early as mine did.  Happy nibbling !

IMG_0708

Ingredients:

2 cups flour
1/3 cup sugar
1 tsp baking powder
1/2 tsp baking soda
1/4 tsp salt (if using salted butter, skip added salt)
6 tbsp butter, cold and chopped
1/2 cup chocolate chunks (more are fine 🙂 )
1/2 cup plain greek yogurt
4 tbsp raspberry jam
1 tsp vanilla
1 egg, beaten
Dash of cinnamon
Dash of nutmeg

IMG_0653

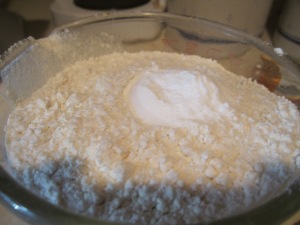
In a large bowl, combine the sugar, flour, salt, baking soda, baking powder and spices and stir to incorporate.  I really enjoy cinnamon and nutmeg with flavors like chocolate, but adding these is not obligatory in any fashion.

IMG_0657

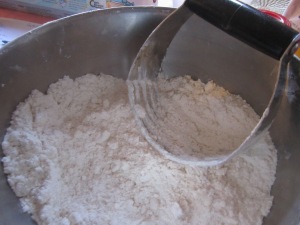
Add the cold butter to the flour.  Using a pastry blender (or your hands – either works fine), work the butter into the flour.  This will take a little bit of time, but be patient.  If you are using your hands, make sure you start with really cold butter.  The warmth of your hands will affect how much flour the butter is able to “absorb,” so to speak.  If the butter absorbs too much flour, the consistency of the final product will be slightly off…no real harm done (whew !) but if you want a “true” scone consistency, don’t work that buttah too much, honey.   The final product should have the texture of crumble – if you squish it, it will keep a basic shape, but upon touching it again will crumble into DUST.  POOF !

IMG_0666 IMG_0669

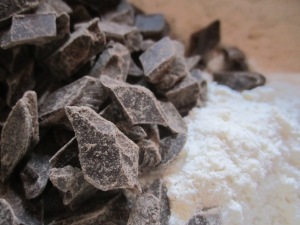
To this mixture, add the chocolate chunks.  Give them a good stir to coat them in the crumble combination.  Once coated, make a chasm (that word has such presence…I definitely need a deep voice to deliver it with full force) in the flour mixture.

IMG_0677

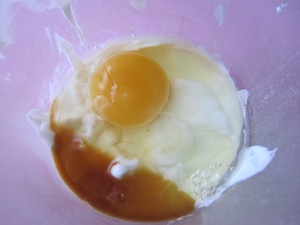
In another bowl, combine the yogurt, egg, and vanilla.  Whisk well to combine.

IMG_0672

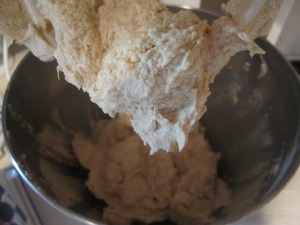
Pour the egg mixture into the hole made in the flour.  Stir with a fork to incorporate, somewhat.  Add the jam and stir until the dough just comes together – the mixture will be thick – that’s okay.  You don’t want to mix it too much or the dough will be chewy and tough.

IMG_0680

IMG_0683

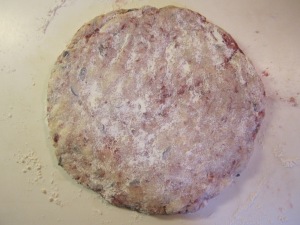
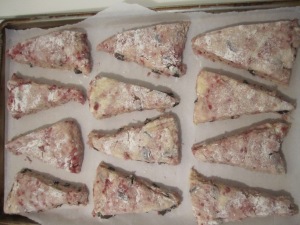
Once the batter just holds together, turn it out onto a well-floured surface.   Form the dough into a circle and cut the circle into triangles to place upon a prepared baking sheet.

IMG_0687 IMG_0691

IMG_0693 IMG_0692 IMG_0694

Cook for about 20 minutes or until golden brown.  Mine are a little more than golden brown BECAUSE my broiler is a little wonky.  If desired, you may dust the scones with powdered sugar and broil them for about 10 seconds to give them a nice crust.  Mine stayed in a touch too long but are none the worse for wear (or taste) !

IMG_0705

Enjoy with a cup of java or tea or simply with your breakfast.  Bon appétit ! 🙂

Categories: English, Uncategorized | Tags: , , , , , , , , | Leave a comment

Chewy Chocolate Chip Cookies

IMG_0390

Well, it happened.  I’m a senior, wading through my final year of university, and joys of syllabus week are, alas, but wee specks in the my rearview mirror.  Homework, late nights, and crunchy leaves pretty much mean that I should be  putting “ma main à la pâte” in a figurative sense…however all I seem to do is literally put my hand to the dough and whip up the fall classic – chocolate chip cookies.

I think I learned how to cook making these cookies.  My mom would let me measure the chocolate chips.  Well, I don’t know if she let me, or if I just did it…because let’s face it, who doesn’t want to sample those delicious morsels of cacao bean delight ?  Also, a five-year-old can’t really mess up that part of the cookie making…unless she eats too many chips…whoops.

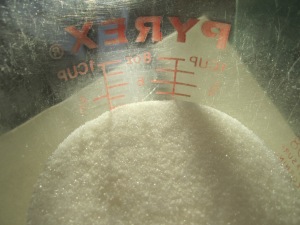
Once I’d mastered that, I could  pack down the brown sugar…add the white sugar…even (eventually) measuring out enough flour (“Liz, fill it to the top of the P” – we had Pyrex 2-cup measuring cups, and I suppose the top of the P was approximately 2 1/4 cups of flour…) for the recipe.  We had (and still have) this rickety metal stepladder on which I’d place the ingredients I’d measured…and then I’d (of course) climb on it to watch all the ingredients go swirling, whirling, twirling around in the MixMaster (Kitchenaid, for those those versed in proper kitchen vocab).  The best part came when I could sample the dough.

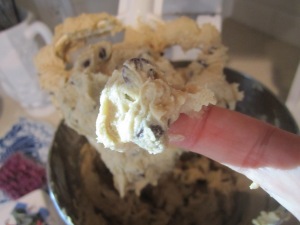
I don’t think anything tops cookie dough batter.  I always wanted to just nibble it raw…but mom would chide, “No Liz !  There are raw eggs in there !  You could get sick !”

She is probably right, but when I make it all on my lonesome, I’m not going to lie, I take a hearty nibble-nom-nom out of whatever “pâte” I’ve put my “main” in.

This recipe is a little bit different than your back-of-the-chocolate-chip-bag variation BUT I think it’s the secret to the perfectly balanced SUPERCOOKIE : add molasses.  It sounds surprising, however the molasses renders the cookie soft and “nuanced,” to borrow some wine-bottle diction.  Just trust me, expert choco-chip cookie master since the age of 5.  Get out of class, whip these up, and forget about your application woes while munching on this old-school afternoon snack.  🙂

Ingredients :

2 1/4 cups flour
1 tsp baking soda
1/4 tsp cinnamon
1/2 tsp salt (only add if using unsalted butter)
1 cup (2 sticks) butter; softened
1 cup brown sugar; packed
1/4 cup white sugar
1/4 cup molasses
2 eggs
2 tsp vanilla
1 bag (12 oz approx.) chocolate chips (you can feel this one out – if you want less, just add bit by bit)

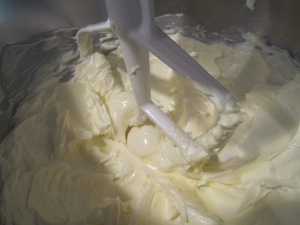
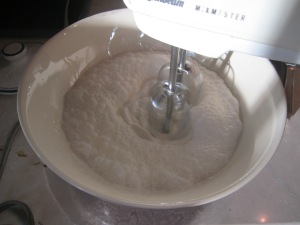
Start by creaming the butter in a large mixing bowl.  If you have an electric mixer, go ahead and fire it up.  If not, get ready to whisk like it’s your job.  You want to make sure the butter is nice and uniform so that the sugar will mix in evenly.  Also, the softening of the butter allows more sugar/ingredients to “dissolve” into the fat, making for a smoother, creamier batter.  (“Liz, soften the butter” “Mom, how ?”  “In the microwave.”  “Mom, what if I melted some of it…”)

IMG_0369

Fun fact courtesy of the padre: if your butter didn’t get soft enough, wrap a warm towel around the mixing bowl.  This will help the butter to soften – it’s particularly effective with a metal mixing vessel.

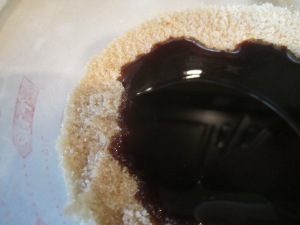
When the butter is light and the whisk/beaters make pretty swirly shapes in the mixture, begin to add the brown sugar.  Beat until the mixture lightens in color.  Add the white sugar and the molasses, beating again until lightened in color.  It should look like very grainy buttercream frosting.  Scrape down the side with a spatula, and mix once again.  (“Mom, can I taste it?”  “Liz, it’s just sugar and butter !  You already know what that tastes like !”)

IMG_0367


IMG_0371

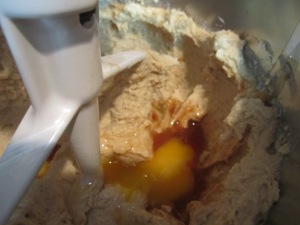
Add the vanilla to the eggs, dropping them in one by one (“Liz, I never add the eggs one by one, it takes too long. I just throw them in there with the vanilla”) beating after each addition.  You can skip this step, as my mom always does, but I like to beat them in one by one – I get to personally make sure each one gets whipped into shape.

IMG_0376

IMG_0378

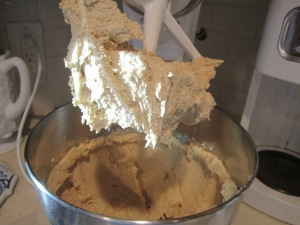
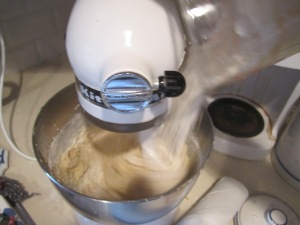
In a separate bowl, combine the remaining dry ingredients – flour, baking soda, salt, and cinnamon – stirring well to incorporate evenly.  Carefully add this to the butter mixture (“Liz, don’t add it so fast !  You’re going to make a mess !”), reducing the mixer speed or using a spatula to combine.  If you go too quickly, the flour will explode in your face and probably make you sneeze.  It’s not worth it.  Take your time AND as an added bonus, play this game :  How little flour/mess can you make in the kitchen ?  It’a really fun game – and worthwhile, too !  Why ?  Because it’s less to clean up later, silly !  Oh, I am brilliant at times.  🙂

IMG_0379

IMG_0382

Finally, add the chocolate chips and stir to combine.

IMG_0386

Mommmmm, can I taste it now ??”

Yes, yes yes yes.  Take a nice good sample of your cookie dough, for this is, arguably, the best part.

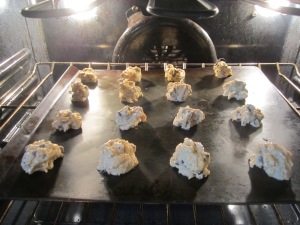
On a large cookie sheet, drop the batter by tablespoons full (“I never bother with spoons, I just sort of eyeball it and use my fingers”) and shape into balls.  I use a big spoon and my fingers and just try to make sure each cookies is approximately the same size.  I really wouldn’t fuss over the size of your balls (“…”) and just have fun plopping misshapen cookie blobs on the baking sheet.  Make sure they are spaced about 2 inches apart from each other, as these cookies like to spread out.

IMG_0387

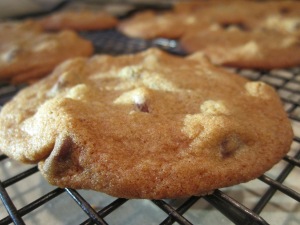
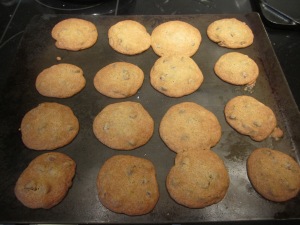
Cook for about 12 minutes per sheet, or until a nice golden brown.  “Light and gooey and yummy and chewy,” as my sibling and I would chant. We take cookies seriously in this household….and this apt.

IMG_0389

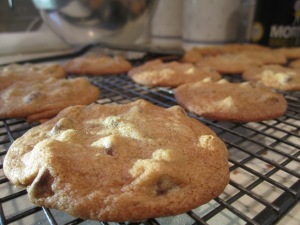
Remove and let cool on a rack (if you can wait that long) or place directly on a plate and devour immediately !

IMG_0395

Happy munching, and bon appétit ! 🙂

Categories: English | Tags: , , , , , , , | Leave a comment

La mousse au chocolat

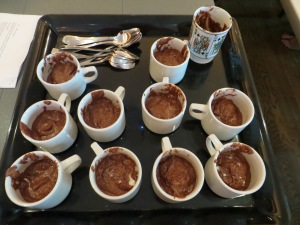
photos classe celine 153

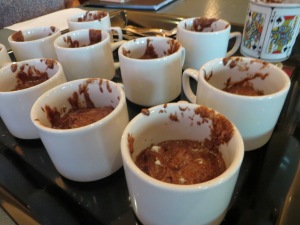
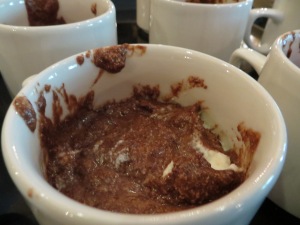
Quest-que-c’est? C’est du chocolat? C’est de la mousse? Non – c’est de la mousse au chocolat! Et c’est déliceux! C’est comme un nuage de Dieu. C’est assez simple, et si nous pouvons le faire, vous le pouvez aussi.  L’arôme chouette va remplir votre cuisiner et à la fin vous aurez un saladier rempli de dessert incroyable.

Les ingredients:

6 jaunes d’oeuf
6 blancs d’oeuf
6 tbsp de beurre
12 tbsp de sucre
1 1/2 tasses de crème à fouetter
12 oz de chocolat noir
1 1/2 tsp de vanille

Les étapes :

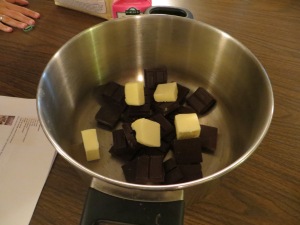
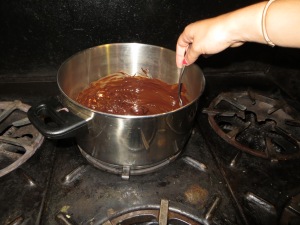
Etape 1:  Dans un casserole, mettez le chocolat noir et le beurre. Faites fondre le chocolat et le beurre au feu doux.

Atelier cuisine 054 Atelier cuisine 058

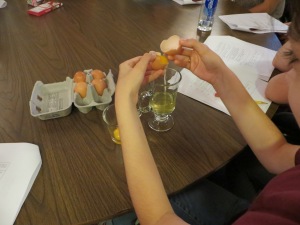
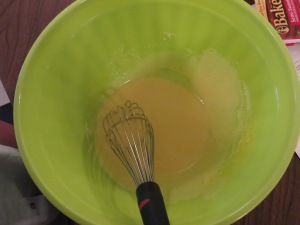
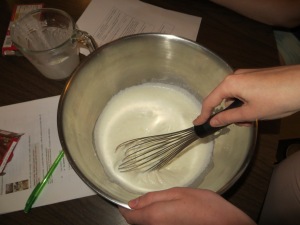
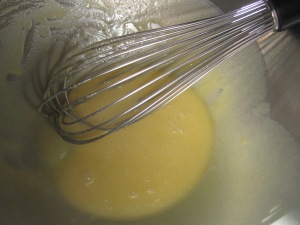
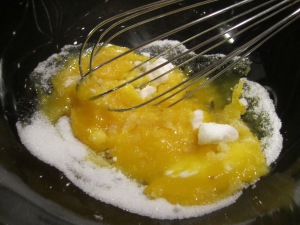
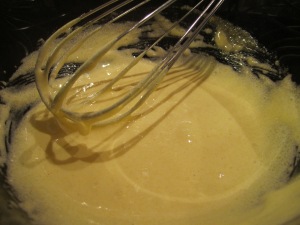
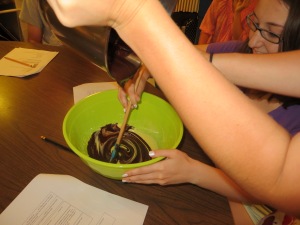
Etape 2:  Fouettez les jaunes d’oeufs et 6 tbsp de sucre dans un saladier. Utilisez un fouet pour tout incorporer. La couleur devrait être d’un jaune clair.

Atelier cuisine 043photos classe celine 055

Etape 3:  Avec un fouet (ou un batteur électrique), battez la crème pour faire de chantilly.  Laissez la crème fouettée à côté.

Atelier cuisine 077

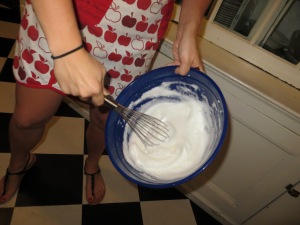
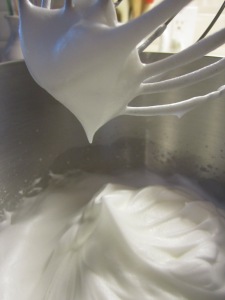
Etape 4: Dans un autre saladier, battez les blancs d’oeuf en neige. Félicitations as Cassandre d’avoir BEAUCOUP BEAUCOUP fouetté 6 blancs d’oeufs – c’est fatiguant !

Atelier cuisine 068Atelier cuisine 085

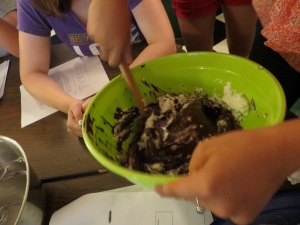
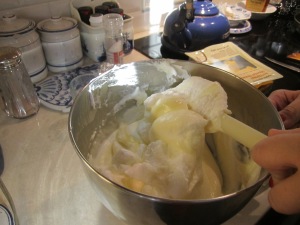
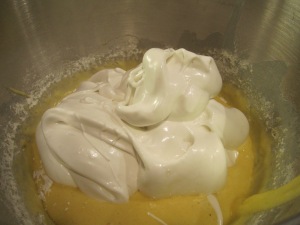
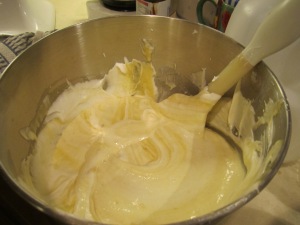
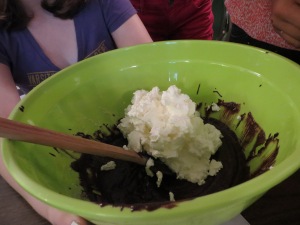
Etape 5: Versez le chocolat dans le saladier avec les jaunes d’oeufs et le sucre.  Remuez bien cette combinaison.  Avec une spatule, ajoutez les blancs d’oeuf en neige et remuez bien. Attention de ne pas trop mélanger !  Pour finir, ajoutez doucement la chantilly.

Atelier cuisine 079

Atelier cuisine 083

photos classe celine 078

Etape 6: Mettez la mousse dans le réfrigérateur pendant une heure avant de la manger.  Bon appétit ! 🙂
photos classe celine 151 photos classe celine 152

Categories: Français | Tags: , , , , , , | 1 Comment

Mousse au Frangelico

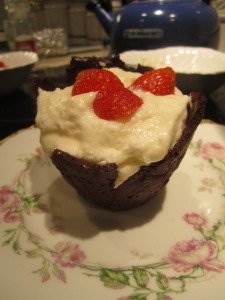
IMG_9932

I was sitting in the kitchen, contemplating the world (as usual) and of course, attempting to make une décision très importante:  what to have for dessert. Crise existentielle de la journée, as one might say.  Alone, with a kitchen just begging to be used, and a sibling returning soon home from her long day over at the Eric Carle Museum…I felt the pressure.  What to do, what to do.

Hm.  I didn’t have any chocolate chips.
Nor enough oatmeal to make oatmeal scotchies.
Not in the mood for pie.

I could make brownies.  But I don’t want those either.

Then I started thinking…what about mousse ?  It was a beautiful day, mousse doesn’t sound hard, and it’s definitely soemthing new. With a bit of luck, sibling called, saying she would happily pick up some ingredients at a local market before coming home.   With her purchasing whipping cream and some native strawberries (for ’tis the season, so they say), I set about crafting some mousse.

I didn’t want chocolate mousse – too rich and I didn’t have the right chocolate for it.  I thought abotu what goes with cream and ended up with…frangelico !  Frangelico is a lovely hazelnut liqueur that is best served (in my humble opinion) with cold cream.  Best friends with the exotic Kahlua and the reliable Bailey’s, Frangelico is another one of those dessert-type liqueurs that comes in an immediately identifiable bottle and possessing an unforgettable flavor.  It’s refreshing and delicious and just sounded fabulous with strawberries and a little chocolate garnish.  When I googled my concept, however, nothing came up.

Uh-oh.

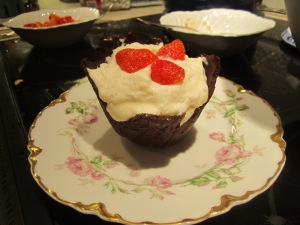
I’ve never made mousse and apparently, the world hasn’t made frangelico mousse – all I located were chocolate-based recettes.  As a result, I made up my dessert and lucky for me, it turned out splendidly.  Light and creamy from both egg whites and whipped cream, the mousse was a great summer treat and the strawberries, being native, tiny, and adorable (I know a souris who would have loved them) added an excellent tartness to the dish.  I served mine in chocolate cups, but you definitely don’t need to do that – the mousse is delicious as a solo act.

NOTE:  MOUSSE REQUIRES THE USE OF RAW EGGS.  PLEASE USE THE FRESHEST EGGS AVAILABLE TO MAKE THIS DESSERT IN ORDER TO AVOID GETTING SICK.  If you buy pasteurized eggs, which apparently exist, make sure the whites are whippable, as some pasteurized eggs lose the ability to whip due to protein denaturation.

For the mousse :

3 FRESH eggs
1 cup heavy whipping cream
2 tablespoons unsalted butter, melted
1 tsp vanilla extract
1/2 cup sugar + 2 tbsp (one for whipping cream, one for egg whites)
3-4 tbsp Frangelico (I did it by taste but I would guess it was about this much)

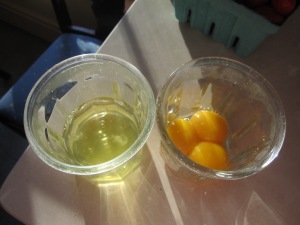
Start by separating the eggs.  Put the yolks in a large bowl and set the whites aside for the time being.  Grab a whisk and roll up your sleeves – mousse requires some serious mixing skills.  Add the 1/2 cup sugar, butter, and vanilla to the yolks.  Whisk until they thicken and lighten in color (this step is also known as ribboning the eggs – it makes sure the sugar is well distributed throughout the yolks).  Add the frangelico, stir, and taste.  The yolk won’t hurt you – be bold and taste it !  You should be able to taste a burst of hazelnut and a tiny bite of alcohol, but not much.  If you want more, be my guest and get those yolks a little silly !

IMG_9895

IMG_9901

IMG_9902

In a separate bowl, beat the egg whites until soft peaks form.  Add 1 tbsp of sugar and beat again to incorporate, staying at the soft peaks stage.  Set aside.

IMG_9915

In YET ANOTHER bowl, whip the cream until thick and looks like a swirly mountain range.  I used the trusty Sunbeam beater to do this because I didn’t want to whisk by hand and I’d already used BOTH electric mixing bowls.  Kitchen drama.  Add the 1 tbsp sugar, mix again to incorporate, and grab a spatula.

IMG_9909

IMG_9913

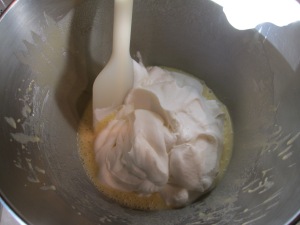
This next bit is a little delicate.  Start by adding the whipped cream to the yolk mixture.  Using a spatula, fold the cream in carefully – we are trying to increase the volume of the combination.  Don’t over mix – it’s okay if it’s not all incorporated because…

IMG_9921

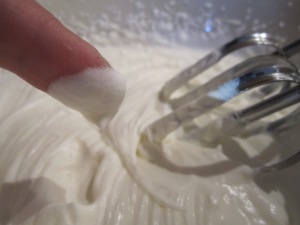
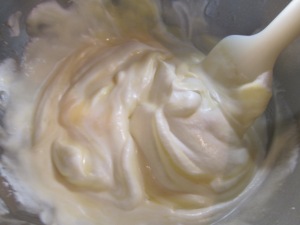
…we are going to fold AGAIN !  Once all the whipped cream has been added, spoon in the egg whites and continue folding.  When complete, the entire concoction should be very airy, large, and a pale yellow color.  Cover your container and let chill until set – probably a good 4 hours.

IMG_9922

IMG_9923

Naturally, we weren’t that patient and ate ours before it had entirely chilled and the sky did not open up nor did the earth quake, so if you are like my sibling and I (two antsy filles with a stubborn sweet tooth), go ahead and indulge early.

IMG_9930

Serve in chocolate cups with chopped strawberries OR on it’s own in a little ramekin OR with a vanilla wafer OR eat it straight out of the bowl.  Bon appétit ! 🙂
Categories: English | Tags: , , , , , , , , , , , , , , | 1 Comment

The Speculatoor

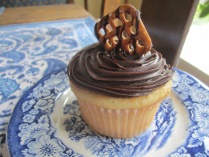
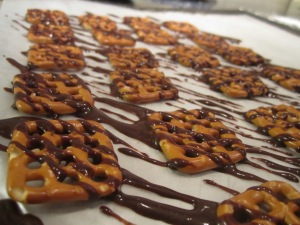
I feel like that's a jaunty pretzel. IMG_9576

With the close of the month of May comes the beginning of every student’s favorite season: summer.  I neglected my blog through second semester (whoops) due to far too many other preoccupations (such as essays, readings, homework, and those dratted friends I love so much…) but scratchbatch is back in action for the summer !  🙂  As I’m bidding farewell to my school work for a small window of time (trading it in for francophone whippersnappers – oui, je suis “prof” en été), I figured a cupcake would be a nice transition piece.
As many of my fellow library-goers know, when I’m studying late at night…my weakness is chocolate covered pretzels and Speculoos spread. (If you don’t know what Speculoos is, you might want to check it out…this cupcake might as well be called the “Belgian Wonder” as it uses two ingredients Belgium seems to understand best: chocolate, and this spread made from spice cookies).  Sometimes together, sometimes apart.  But truly, those are my go-to nibble foods.  With a cappuccino.  Naturally, crunching away helps my productivity.  It does.  Really.  Kat knows exactly what I’m talking about. Meow.

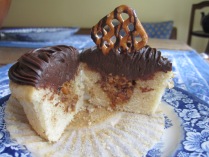
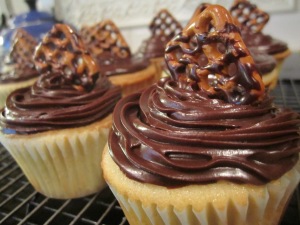
In any case, what does this have to do with cupcakes ?  Given my love for this combination, I had the notion that perhaps these flavors would make a nice cupcake. (Baked and Wired, this is where you start paying attention – this cupcake is for YOU.  It says “Sell me !  I would be best friends with the Tessita and you know it !”  Cupcakes are rarely wrong about these things, so I suggest you listen up).  The Speculatoor consists of a moist vanilla cupcake filled with speculoos and pretzel topped with a thick, chocolate satin ganache. Yes, it tastes just like the real mccoy from this fabulous bakery.  No, I didn’t have to bribe the bakers…I just sort of made it up.  Every once in awhile you get lucky.

An easy cupcake to craft, it takes a bit of patience, but the end result is really quite decadent and delicious – worthy of D.C.

Vanilla Cupcakes:

1 stick butter
1 cup sugar
1/2 cup milk
1/3 cup plain yogurt (or sour cream)
1 1/2 cups flour
1/2 tsp baking powder
2 eggs
1 1/2 tsp vanilla
Dash of nutmeg, cloves, and cinnamon

Directions : Preheat the oven to 350F and line one muffin tin – this recipe will make twelve cupcakes.  Double it for 24.

IMG_9528

In a small container, mix together the yogurt, milk and vanilla.  Whisk together to incorporate and set aside.  This will be added in tandem with the flour a little later.  Why ?  Because we want the milk to react with the baking powder at the right moment in time – just before heading into the oven for the optimum rising reaction.

IMG_9533

In a large mixing bowl, combine the flour, spices, and baking powder.  Stir well to evenly incorporate the leavening agent.  Set aside.

IMG_9530

In yet another container, cream the butter until nice and light.  Add the sugar slowly, again beating until fluffy. From here, add the eggs and mix until smooth.  I might add that bringing all the ingredients to room temperature make the mixing process easier BUT FEAR NOT if you didn’t realize this was helpful: you can always wrap a warm towel around the mixing bowl and all will incorporate sans problème.

IMG_9532 IMG_9537 IMG_9539

To the butter mixture, add the flour and the yogurt combinations; start with the dry and alternate between the two.  Mix until uniform and then pour into cupcake pan, being careful not to overfill the tray.

IMG_9540 IMG_9543 IMG_9544

Cook for about 20 minutes or until the cake springs back when pressed.  Let cool before moving on to the next step.

Speculoos filling

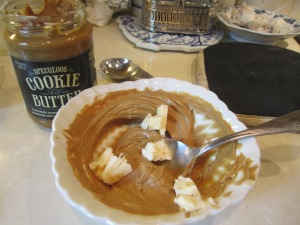
3 heaping tablespoons of Trader Joe’s cookie butter
2 tbsp butter, softened
Some pretzels, crushed
A few turns of coarse salt
2 tbsp cream or milk
2 tbsp confectioners’ sugar

Directions : Place the speculoos and butter into a small container and whip.  The mixture should lighten slightly in color.

IMG_9547 IMG_9548

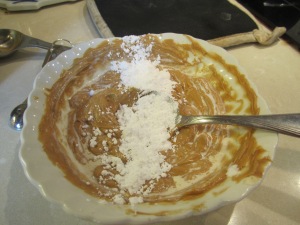
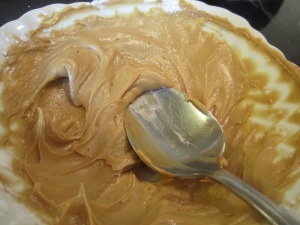
Add the cream and the confectioners’ sugar, whipping again.  Add the salt. Take about 2/3 of the smooth mixture and transfer to another container.

IMG_9549

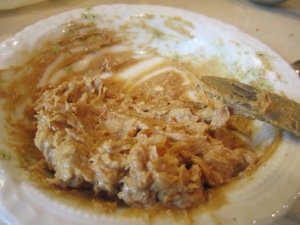
Into this, stir in the crumbled pretzel bits.  I like to taste along the way – I was looking for a center that would be sweet at the start, but upon chewing would yield a little burst of salt.  If you prefer just smooth and sweet, skip the pretzel step.

IMG_9550

When the cupcakes are cool, use your finger (or a 1/2 tsp) to create a little hole in the center of each cupcake.  Spoon in the crunchy speculoos-pretzel mixture.  Top with a little covering of the smooth speculoos concoction and set aside.

IMG_9551 IMG_9552 IMG_9553

Chocolate Satin Ganache

1/2 cup light cream (or half and half)
4 oz unsweetened chocolate, chopped
1 1/2 cups confectioners’ sugar (I would use less but I like VERY.DARK.CHOCOLATE.)
3 tbsp butter, chopped
1/2 tsp vanilla

I think this is the best chocolate frosting I’ve ever made.  It is really easy to make and will definitely become a staple in my cookbook.

Directions : Pour the cream into a small saucepan and let come to a light boil. In another bowl, place the chopped chocolate.  I used Bakers unsweetened chocolate squares, 4 of them, but I think using a higher quality chocolate would yield an even better product.  That said, I wasn’t disappointed by my pantry’s standby.  The hot cream will melt the chocolate; whisk to combine.  Add the butter and mix together.  Again, the combined heat should be enough to melt the butter.  Whisk in the powdered sugar and vanilla last, stirring until just combined.  Let cool.  I placed mine in the freezer to cool faster…impatient little cook that I am.

IMG_9558

When cooled and thickened, break out your hand mixer (I have a trusty old Sunbeam) and whip until nice and spreadable.  The mixer might groan a bit but this step is crucial.

Spoon into a pastry bag and swirl onto the cupcakes !  I topped mine with chocolate drizzled pretzels, but there’s no need to be fancy about it.

IMG_9559 IMG_9567

Enjoy with a cup of tea (or hot milk) !  Bon appétit 🙂
Categories: English | Tags: , , , , , , , , , , | 3 Comments

Boston Cream Pie

A slice of life

Birthday cakes can be tricksy at times.  You are trying to make something that both appeals to the person in question AND to the other guests AND to yourself (in this case).  You don’t know if folks are wild about frosting, or prefer cake.  What about ice cream ?  Should candles grace the top ?  Far too many questions.  I’m already overwhelmed.

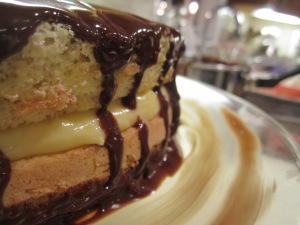
While I was home, my dad celebrated his birthday (he’s probably 21* now, quite the young’un).  He notoriously doesn’t like to eat white sugar.  Or chocolate.  Or sweets in general when attempting to be healthy.  However, I (being his daughter) know his weakness :  Boston Cream Pie.  When my sister and I were younger, he would sneak one out of Roche Bros. supermarkets as a treat or a fun dessert – which is how I came to know what Boston Cream Pie even was, for it is somewhat of an obscure dessert, with origins both in New York (for the original “pudding cake”) and in Boston (from the Parker House, which copied the NYC cake but topped it with chocolate glaze).  A nice, light, vanilla sponge cake filled with rich vanilla cream and slathered with fine chocolate ganache, this is a surprising birthday gateau – no ice cream necessary and yes, the candles will stay on and no – there is NOT very much butter involved.  It is surprisingly simple to make (once you get over the fact that yes, you need a billion eggs) but will take time and patience, for each component has to be done at a separate time.  If you have a snow day to spent inside, give this “pie” a whirl !

Pastry Cream :

1/4 cup sugar
3 large egg yolks
1/8 cup flour
3 tbsp cornstarch (scant – err on the side of LESS)
1 1/4 cups milk
1 1/2 tsp vanilla

I like to make the cream EITHER before I make the cake OR while the cake is cooking – it just depends on your preference, for the cream will need to chill for awhile.

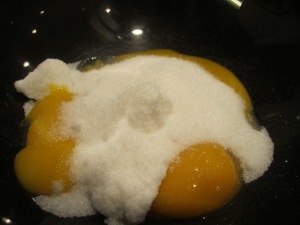
In a medium-sized bowl, combine the egg yolks and the white sugar.  Whisk together until nicely ribboned.  Ribboning is when the sugar and the eggs are combined so that the whisk, when lifted out of the pan, causes the mixture to run in a nice, thin ribbon of light yellow goodness back into the bowl.

Mmm. Yolky.

Mix mix mix

Finished product !

Add the flour and the cornstarch and mix again until smooth and pasty.  It should seem very thick and remain a light yellow. The flour and the cornstarch will act as thickening agents for the cream.  When they are heated, they release amylose, a starch molecule, that expands when exposed to water.  The eggs are also thickeners – as they cook, their protein structure changes to become less fluid and more solid.

Flour power

Extremely viscous.

Set aside for the moment.

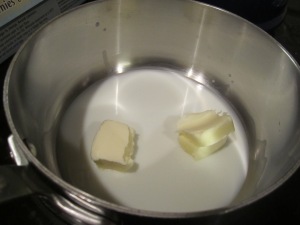
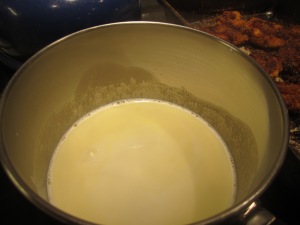
In a medium saucepan, heat the milk until it is barely boiling.  You will see steam rising from the milk and small bubbles forming on the sides of the pan.  THIS NEXT STEP IS IMPORTANT SO PAY ATTENTION :  We are going to do a little pouring and it might get messy but “if you’re alone in the kitchen, who’s to see ?” (Thank you Julia Child/Meryl Streep).  Here is the game plan : because the eggs are not hot, but the milk IS hot, we don’t want to just dump the eggs into the milk as they will cook/curdle/the cream will not be creamy.  It will be lumpy.  No one wants tapioca-like cream when tapioca is not an ingredient.  So, we have to temper the egg yolks – give them a chance to get used to the heat before throwing them into the fire..rather like when you don’t want to get into the cold ocean right away and you slowly tiptoe your way in.

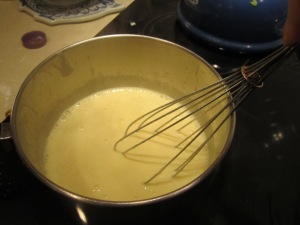
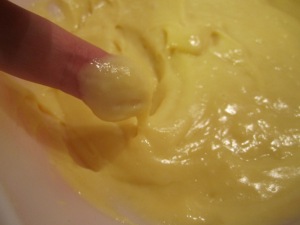
Pour half of the hot milk into the egg mixture being sure to WHISK FRANTICALLY.  Then, pour the eggy concoction into the OTHER half of the milk, do not stop whisking, and place THAT back on the heat.  Whisk whisk whisk until you think your wrist is going to cry.  The mixture should instantly start to thicken. Add vanilla.  When it looks like custard, remove from heat and transfer to a clean bowl.  Place this bowl IMMEDIATELY into the fridge or into an ice bath to stop the cooking.  I never use the ice bath – I just chill mine – and all is usually well.

I've a frisky whisk...

You should be able to sample without drippage.

Let chill until cold and ready to use as filling !

Sponge cake :

5 large eggs
2/3 cup white sugar
1/2 tsp vanilla
1 1/4 cups flour
1 tsp baking powder
1/4 tsp salt
3 tbsp milk
2 tbsp butter
1/8 tsp cream of tartar (for egg whites)

Preheat oven to 350F.  Line two 9” round pans with parchment paper (or grease well with butter).  Sponge cakes can be a little tricky, so using parchment paper takes some of the anxiety out of the removal process.  Separate three of the five eggs and allow them to come to room temperature before using.

In another bowl, blend together the flour, baking powder, and salt.  I love nutmeg and I think it tastes really nice sprinkled into the cake batter, so I add a few shakes of that to the flour mixture.

Place the milk and the butter in a saucepan over low heat and remove one the butter has melted.

Butter me up ;)

"buttermilk"

 
In a mixer (or by hand in a large bowl), beat 6 tablespoons of sugar with the yolks and the two eggs until they lighten significantly in color.  Just as we did with the pastry cream, make sure they from a thin ribbon when lifted from the beater.  Add the vanilla and mix well.

L'eggo !

Whirrrr

Frothy (like my name)

In another bowl, beat the three egg whites (with a pinch of salt and the cream of tartar) until they resemble soft peaks.  If you are doing this by hand, it can be very tiring – soft peaks should allow the whisk to lift up, make a poof, and then that poof will stay stationary.

Add the flour mixture alternately with the warm milk mixture until just combined. Be careful not to overmix as the batter has yet to be folded.

Blending the flour.

HERE COMES THE BEST PART !  Fold the egg whites into the batter very gently.  In a sponge cake, the egg whites are the rising agent – there is no baking powder that causes the cake to expand.  Instead, it is the air trapped in between the newly-arranged proteins of the egg white that give the cake is sponginess/spring.  That said, if you mix too much, it will fall and taste rubbery.  Not enough ?  You’ll have blips of egg white (that don’t taste like anything) interspersed throughout.  It’s a delicate balance but aim for a swirled effect and the cake should turn out fine.

IMG_8621 IMG_8622

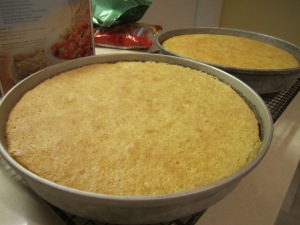
Pour into prepared pans and bake until golden brown and springy to the touch – about 20 minutes, depending on the strength of your oven.

The cake is a lie.

Chocolate glaze :

6 ounces (or so) of nice dark chocolate, chopped (I use chips)
1/2 cup cream
1 1/2 tbsp butter
Optional :  A little amaretto or frangelico adds a nice touch.

Place the cream and the butter in a pan over low heat.  Once it begins to simmer, pour the chocolate in and let stand for 2 minutes (off the heat) before whisking smooth.  Add the liquor if desired.

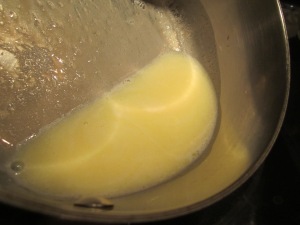
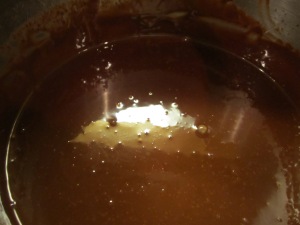
Butter and milk, again. Brown gold.


Assembly :

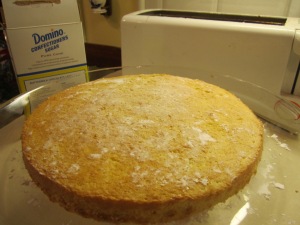
First, take one layer of the cake and dust the top with confectioner’s sugar – this will make it less sticky and easier to handle when placing it on the cake stand (or plate).

Dusty...

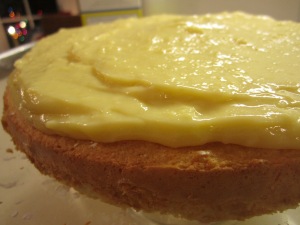
Remove the cream from the fridge and spread over the cake layer – don’t be afraid to load it up. Some might ooze out the sides, but that can be tidied up later.  The cream is my favorite part, so I’m not really fussed if it’s a smidge messy.

Oh creamy goodness.  Come to mama.

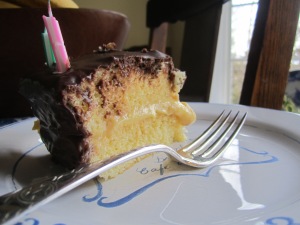
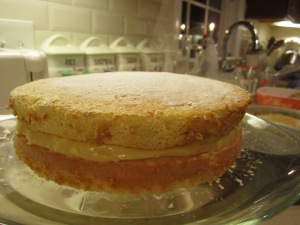
Place the final cake layer on top of the cream and slowly spread the warm chocolate ganache over the layer.  Do one thin layer, wait until it cools a little, then add another layer to avoid too much dripping.  That said, I think part of a Boston Cream Pie is a few rivulets of chocolate down the sides…but it’s up to you.

IMG_8653 IMG_8664

COVER IN CANDLES, SING TO THE OLD MAN, AND ENJOY !

Bon appétit !

Happy Birthday !

Categories: English | Tags: , , , , , , | 2 Comments

Vegan Chocolate Cake with Blackberry Filling and Spiced Chocolate Buttercream

Yes, you read the title right.

Vegan chocolate cake.  Vegan buttercream.  Vegan dessert.

I think I am probably the most omnivorous person around – I really love all types of food.  Meat, milk, fish, vegetables, sugar (obviously)…the list goes on.  Baking with limitations, therefore, is not my forte.  However, one of my closest friends is vegan, choosing to eliminate all sorts of ingredients commonly found in sweet delights from her diet (which totally amazes me.  I could never do it, so PROPS TO YOU, Miss Bailey !).  When her birthday rolled around, I was DETERMINED to concoct a vegan-friendly dessert…for what is a birthday without cake ??  Though it was definitely an adventure for me (the ingredients list is more exotic than normal…did you know vegan butter exists ?!  Super cool !), the end result was pretty tasty – I would definitely make the cake again.  While I’ll admit that it feels strange to make a cake without eggs, the texture is exactly the same as any chocolate cake I’ve ever eaten and I bet a blind taste test would fool you.

In order to make the cake a little interesting, I chose to fill the center layer with blackberry jam and add spices to the frosting – there is nutmeg, cinnamon, and cloves added to the frosting to bring in a little texture and round out the cocoa flavors.

Give it a try – you’ll be pleasantly surprised.  🙂
For the cake :

2 cups all-purpose flour
3/4 cup natural cocoa powder
2 teaspoons baking soda
1 teaspoon baking powder
1 3/4 cup unsweetened soy milk
2 teaspoons red wine vinegar
1 2/3 cups sugar
1 cup olive oil
2 tablespoons vanilla extract
A few shakes of cinnamon

Preheat the oven to 325˚F. Grease two 9-inch round cake pans and line them with parchment paper.  Combine the flour, cocoa powder, baking soda and baking powder in a large mixing bowl and stir to combine. In a separate bowl, whisk together the soy milk, vinegar, sugar, oil, and vanilla. I know, it looks a little odd – vinegar and olive oil usually connote salad dressing – but I promise it works out in the end !

Pour the milk mixture into the flour mixture and stir with a spoon until well combined.

Spoon or scrape the mixture into the prepared cake pan and bake for 40 to 55 minutes.  You’ll know it’s done when you smell the cake and a fork comes out clean.

Run a knife around the edges of the pan to loosen before inverting the cake onto a wire rack (or if you are a lowly college student, on a plate dusted with confectioners’ sugar) to cool.

For the filling :

Blackberry jam – I used about 1/3 of a jar….but this part is entirely subjective – use as much or as little as you please.  Also, I think that raspberry jams would be DELICIOUS in place of blackberry.

For the frosting :

1/2 stick vegan butter
2 cups confectioners’ sugar
1 cup cocoa powder (more or less depending on your love of bitterness)
1/4 cup soy milk
1/2 tsp vanilla
1/4 tsp nutmeg
1/2 tsp cinnamon
1/8 tsp cloves

In a large bowl, whisk the vegan butter until it’s creamy.  Add the cocoa powder first, blending slowly until well incorporated (start slow simply to avoid cocoa powder explosions…that fine dust tends to make me sneeze when it clouds the air).  Add the vanilla and the powdered sugar, adding the soy milk when necessary to assure a good texture. Add the spices last.

Make sure to taste along the way to make sure everything is to your liking – I gave my ratios of spices BUT THEY ARE APPROXIMATE as I tend to make it up as I go, adding a dash of this and a dash of that until I find the taste I prefer.  It’s good to be spontaneous.  🙂
Assembly :

First, center one layer of the cake on a plate that has been dusted with powdered sugar.  This will be useful when the time come to cut the cake, as each slice will be easy to remove.

Using a flat metal spatula, (or a knife…again…I lack proper tools) spread a very thin layer of the frosting on the cake.  As we are going to add jam, this thin coating of frosting will keep the cake from going soggy on the inside.

Once evenly distributed, add the jam, spreading with the back of a spoon.  I love jam, so I was rather liberal with the amount I put on the inside…it is your call.

Prepare the second cake layer by spreading another thin layer of frosting on the side that will touch the jam.  Once ready, flip this layer onto the jam layer. It’s a process but it isn’t that difficult – if you miss, just pick the cake up and put it back on.  No harm done !

Cover the rest of the cake with the frosting.  Dust the top with a combination of the spices used in the frosting – it looks classy and tastes good, too.

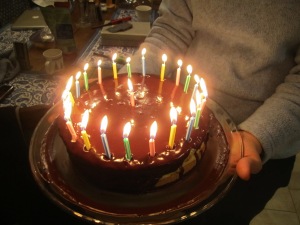
We obviously decorated ours with candles….

Happy Birthday, Bailey & Ambika and bon appétit !


Categories: English | Tags: , , , , , , , , , | 1 Comment

I want s’more cupcakes !

I went on a little vacation a few weeks ago with the intention of devouring s’mores.  This is pretty much the only time I consider Hershey’s milk chocolate bars to be an acceptable ingredient for cooking (given that Hershey’s is pretty much made of wax, additives, vegetable oil and little cocoa butter.  It’s all lies, guys.  It’s alllll lies) as I really don’t like the texture or bizarre taste of this “chocolate.”  HOWEVER, all that aside, you really can’t have a legitimate s’more without Honey Maid graham crackers, Jet-Puff Marshmallows, and Hershey’s Milk Chocolate.

We get to an evening that would be perfecto for these treats only to discover –

We left the graham crackers at home.

NOOOOOOOOOOOOOOOOOOOOOOO !  THIS CANNOT BE !

As a result, I decided to prepare some cupcakes the other day in order to satisfy my apparent need for these flavors.  I was driving home after a long, tiring day of work and my sister called me asking for something sweet.  Knowing we had these ingredients already on hand…I decided to mix these up.  They were really good and had a long shelf life – I made them on Wednesday and they were still good on today…as I gobbled up the last one for breakfast this morning (oh, so healthy…)  I hesitate to call them “S’mores Cupcakes” because I have a recipe for those and this is different…it’s a vanilla cupcake with marshmallow frosting and a little nest of chocolate waiting to surprise you underneath the fluffy goodness.

You just can’t go wrong.  🙂

For the cupcakes :

3/4 cup milk
1/2 cup sour cream (or plain yogurt – I used plain yogurt this go around)
2 1/2 tsp vanilla
2 3/4 cups flour
1 tsp baking powder
1/2 tsp salt
1 cup butter
2 cups granulated sugar
3 large eggs

Preheat oven to 350F.  Line the muffin tin with paper liners.  In a small mixing bowl, combine the milk, sour cream, and vanilla.  Let sit.  In a separate bowl, mix together the flour and baking soda.  I also love to add a few shakes of cinnamon to the flour.

Cream the butter and sugar until light and fluffy in a large mixing bowl.

Add eggs, one at a time, beating well after each addition.

Once smooth, add the flour mixture and the milk mixture at the same time, stirring only until the batter comes together – as usual, if you overmix, the cupcakes will become tough.

Fill the muffin tin and place in the oven, cooking for about 20ish minutes.

Use your nose to know when they are cooked – these cupcakes will not brown much and are very moist (due to the presence of the milk fats/yogurt) so pressing them with your finger will be enough to test their doneness.  Let cool on a cooling wrack until they reach at least room temperature.

For the chocolate “nest” :

Some chocolate
Some crushed graham crackers
Some butter
Some cream

I think you guys can figure out the proportions yourself…as I did just a handful of chocolate chips, a few tablespoons of butter, a splash of cream, and then probablyyyyyy 10 or so graham crackers (?)  The process is simple – melt the chocolate and the butter over the stovetop until smooth.

Add the graham crackers and then a little cream to keep things smooth.

Stir until the crumbles are coated with chocolate.  It should look like this :

Marshmallow frosting :

1/3 cup water
1 cup sugar
1 tsp vanilla
2 egg whites
Pinch of salt and cream of tartar

NOTE :  It is not necessary but it is rather handy to have a candy or frying thermometer on hand for this frosting – it is, however, possible to complete it without this tool.  You will simply need to watch the sugar and water mixture.  It will start out being very liquid and, after boiling for about 10 minutes, will turn glassy.  When you notice this change, lift the spoon out of the bowl and observe the syrup – if it pours off the spoon on a long, thin stream and, when poured into cold water, forms a thread, it is complete.

If you have a candy thermometer, boil the sugar and water until the soft ball stage, otherwise known as anywhere between 235 and 240F.

NOTE :  Once the sugar and water have dissolved into one another, DO NOT STIR.  If you stir too much, you can agitate the sugar crystals and potentially create a “seed” – this will signal the sugar to begin crystallization and you will end up with rock candy…not really what we are looking for.  Just let it bubble away until you see that magical temperature.  Turn off the heat and prepare to pour.

Meanwhile, put the egg whites, salt, and cream of tarter in a large mixing bowl and whisk or beat until frothy.  The egg whites should be able to hold the bubbles well and keep VERY soft peaks.

Once the sugar and the eggs are ready to go, turn the mixer on full blast.  SLOWLY, pour the HOT, BOILING SUGAR into the egg whites in a LONG, THIN STREAM.  Be sure to add the sugar syrup very gradually and continue beating until the bowl is warm to the touch (rather than super hot, which it will be !).  The frosting should be bright white and shiny – just like marshmallow fluff.   Add vanilla and taste !

Note :  use this frosting right away – as it is egg white-based AND sugar based, it will dry out and become difficult to manipulate if you wait too long to use it.

Assembly :

Once the cupcakes are cool, use a spoon to place a small circle of chocolate crumble on the top of the cupcake – it should be the size of a silver dollar – leaving a border of clean cake.  On top of this, pipe (or spread) the marshmallow frosting in any design you like…I prefer to make big mounds of marshmallow (rather like the wigs presidents such as Washington used to wear…) as the frosting does dry out slightly and the more you add, the longer it stays smooth.

As a final step, I burned the marshmallow.  This is definitely optional however if you feel like getting fancy, grab a blow torch (yes, you can use a big one) or a lighter and hold it just close enough to the frosting to toast it like the marshmallow it is.  The kitchen is going to smell divine after this little adventure…

These paired particularly well with earl grey tea…or even just a glass of milk !

Bon appétit !

Categories: English | Tags: , , , , , , | 2 Comments

Chocolate Raspberry Crunch

My sibling loves chocolate.  In fact, I think she loves chocolate more than anything else on the face of the planet.  Except for stuffed animals.  And Doctor Who.  Maybe.   In any case, she celebrated her birthday just the other day and I was (naturally) in charge of the cake.  She told me she wanted chocolate and raspberry to be involved…but other than that, I had free reign.

In all honestly, I was just going to make a straight-up double-chocolate cake with raspberries on top.  You know, chocolate cake, chocolate buttercream, raspberries.  BOOM.

But…then I got to thinking.  I could make a raspberry filling.  Hmm.  And all that chocolate needs some variation.  Maybe I could make a feuilletine-type layer, with a little crunch for “texture,” as they say on all of those fancy cooking shows (that I adore watching).

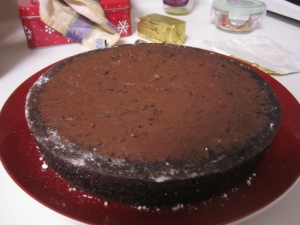
And we were off to the races.  I ended up making two round layer cakes of regular chocolate cake.  I cut each layer in half and put a different filling on each layer, one being a chocolate cookie crunch (feuilletine), a raspberry buttercream, and a dark chocolate raspberry ganache, finally smothering the entire gateau in chocolate buttercream. And lining it in fresh raspberries.

Yes.  I know.

Need I add that it was about 90F outside and there is no AC here in da kitchen.  The chocolate melted all on its own….

I don’t really have a name for this cake…so “Chocolate Raspberry Crunch” is a working title.  Any suggestions are MORE THAN WELCOME .  Also, given the experimental nature of this cake, I do not have specific measurements for the fillings.  I’ve given approximations, but know that you may need to change the amounts if you (dare?) attempt this delicious, decadent and dangerous torte.

For the cake : look on the back of a Trader Joe’s cocoa box !

3 1/2 cups flour
3 cups sugar
5 eggs
1 1/3 cups cocoa
1 tbsp baking soda
1 tsp salt
12 oz butter
3 cups milk
1 tsp vanilla

 Preheat oven to 350F.  Prepare two 9-inch round cake pans.  Know that this cake does sometimes make extra batter – the pans I normally use are a little small, so I often have a little leftover.  If you use pans with a removable bottom (like I did this time), all the batter will fit.
Crack the eggs into a large bowl.  Cream together the EGGS and the SUGAR until you reach the ribbon stage.  For more information on ribboning, please scroll down to the Fraisier post.  🙂 Add the milk and vanilla and mix until smooth.
In medium pot, melt the butter and stir in the cocoa powder until it looks like velvet.  Yes, velvet.
Mix together the flour and the baking soda in a large bowl.  Add this to the egg mixture at the same time as the chocolate, as if you were making brownies.  Stir until uniform and incorporated – about 2 minutes.  TASTE:  It should taste like chocolate.  This is my one big critique of chocolate cake :  it often doesn’t take enough like chocolate, so I end up adding more cocoa…
Pour the batter into the prepared pans and place in oven.  Let cook for about 45 minutes or until springy to the touch.  Remove and let cool.

For the feuilletine :

A handful of chocolate chips…
Some butter….
A bunch of butter cookies (shortbread, waffle cookies – anything crunchy with a vanilla-type flavor.)

Prepare a jelly roll pan by covering it with tin foil (or parchment, or wax paper…whatever you prefer).  I placed mine in the freezer to cool it off.

Put the cookies in a small plastic bag and beat with the back of a spoon until nice and crushed.

In a separate pan, melt the butter and the chocolate chips, stirring until smooth.  Pour the cookie crumbles into the pan and stir until they are covered in chocolate.

Pour the chocolate mixture on top of the jelly roll pan and, using the back of a spoon, spread it until it is as thin as possible.  I made mine into a circle, guestimating the size of the 9” pan.  Place this in the freezer to chill/set.

For the raspberry buttercream :

Raspberry syrup (seedless)
Butter, soft
Confectioner’s sugar

In a large bowl, cream the butter.  Add the raspberry syrup and taste for raspberry flavor.  Add sugar until the butter taste has diminished.  Set aside.

For the dark chocolate raspberry ganache :

Another handful of chocolate chips
Cream
Raspberry syrup

In an effort to minimize dirty dishes, I re-used the pan in which I melted the chocolate for the crunch layer.  If you do the same, start by adding the raspberry syrup and whisking over high heat.

Bring that syrup to a boil.  Add 1 tbsp cream and continue whisking.  When hot hot hot, remove from heat and add the chocolate chips.  Let sit 1 minute before whisking together to combine.  Add another tbsp cream and taste.  It should taste like a lindt raspberry truffle.

Add more chocolate or raspberry or cream to adjust the flavor as you like it.  The mixture of the syrup and chocolate is surprisingly forgiving and can take a fair bit of variation.  Let cool in the fridge.

For the chocolate buttercream:

1 1/2 sticks butter, soft
1 1/3 cups cocoa
Powdered sugar
Cream (for texture)

In a large bowl, whisk the butter until light and creamy.  Add the cocoa and whisk again.  Add sugar until the frosting is as sweet as you like.

I make a very bitter frosting – I really like the deep and strong flavor of cocoa powder, so I avoid adding a lot of sugar.  In fact, little note for everyone : when recipes state how much powdered sugar to add, I usually halve it.  Too sweet !

Assembly:

This is a little tricky.  First, cut both layer cakes in half.  Place the bottom layer of one of the cakes on a large, flat cake plate.  Get the crunchy layer out of the freezer and (bring to room temperature if possible.  I didn’t have to wait long given the suffocating temperature of the kitchen) and place the empty cake pan overtop.  Cut the feuilletine down to size, nibbling the leftovers.  Place the chocolate layer on top of the cake and then peel the foil (or paper) off. Place the second cake layer on top.

Grab that raspberry buttercream and spread that on top of the next layer.  Leave a border without frosting – it will leak out as you put the other layers on.  Cover with the third cake layer.

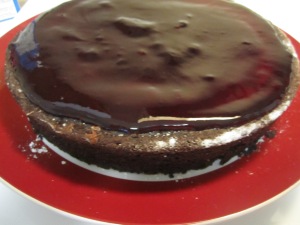
Remove the ganache from the fridge and bring to room temperature – though highly viscous, it should still flow.  Pour overtop the third layer of cake, again leaving a little border by the edge so that it will ooze properly.  Cover with the final layer of cake.

Get the chocolate buttercream and cover the cake, being sure to spread overtop the sides before adding more to the top.  Decorate with raspberries.

CUT AND SERVE, preferably with a glass of ice cold milk OR fresh-brewed coffee.

Bon appétit !

Categories: English | Tags: , , , , , | 4 Comments

Homemade Oreo Thin Mints

I usually am not a fan of packaged cookies…why ?  BECAUSE they are easy (at hand, perfect for nibbling, pre-made, no stress, so simple…) and expensive (why, Nabisco, why ???) and full of unknown ingredients (preservatives ? Wax?  Wood shavings ?).  Mixing everything up by hand is just how I grew up (for the most part) and so boxed cookies are a “special event.”  Social Teas and Le Petit Ecolier excluded.

However…the other night, a friend of my family’s brought over these delicious little creations that are sort of like thin mints (those Girl Scout cookies that are über popular) and a peppermint patty.  It’s a thin wafer cookie – the bottom of an oreo – with a layer of mint cream on top that is subsequently smothered in chocolate.  On a hot night, these cookies are oddly refreshing…particularly when they come out of the freezer.

Somehow, I didn’t think my mother would be keen on buying Oreo’s latest creation, so I decided to make them myself.

Yep.  I’m making THIS :

It’s surprisingly simple HOWEVER BE WARNED : This recipe takes time.  Each individual component is easy to make, but the process of assembling the cookies themselves is rather involved.  If you have children who like helping in the kitchen (or a bunch of people who like rolling out dough and cutting it into shapes à la Christmas cookies…), then this is a great recipe.

I promise you…it’s worth it.  My sister says that these are the best cookies I’ve made to date in my life…given my love of baking, that’s a pretty regal compliment.

For the cookie:

8 oz butter
1 cup cocoa powder
1 cup powdered sugar
1 tsp vanilla
3/4 tsp salt (optional)
1 1/2 cups flour

Preheat oven to 350F.  Cream butter until light and fluffy.

Add the powdered sugar and beat again, keeping that fluffy texture.  Add the cocoa powder and watch out for cocoa clouds!

Stir in vanilla.  Add the flour; combine until the dough forms a ball.  Knead on countertop before putting it in plastic wrap.  Allow the dough to chill in the fridge for 1 hour (or in the freezer for 15 minutes).  Roll out the dough on a well-floured surface and cut into rounds.

Place on a baking sheet (the cookies won’t rise) and cook for about 10 minutes.

For the filling:

2 1/2 cups powdered sugar
1 1/2 tbsp light corn syrup
1 1/2 tbsp water
2 tsp peppermint extract
1 tbsp butter

Combine the 2 1/4 cups sugar, the corn syrup, water, extract, butter and salt and beat until combined. It will be quite malleable.

Dust work surface with remaining sugar and pour mixture overtop sugar.  Knead until smooth – it only takes a few turns.

Roll between two sheets of parchment paper until about 1/4 inch thick.

Freeze until firm – about 15 minutes.

For the coating:

10 oz semisweet chocolate
1 tbsp butter

Melt the chocolate and butter over the stovetop on LOW HEAT.

Assembly:

When the cookies have cooled, lay them on out a baking sheet covered with tin foil.  Remove the mint filling from the freezer and place on countertop (peel off parchment paper).

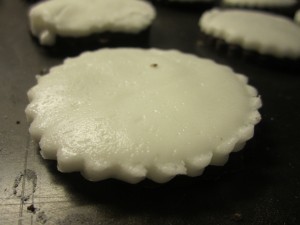
Using the same cutter as was used for the cookies, cut rounds of the mint filling and place them on top of the cookies

.

If your kitchen is warm and the filling starts to get sticky, place in the freezer again before covering with the melted chocolate.

Store in the freezer and laugh in the face of Oreo !

Bon appétit !

Categories: English | Tags: , , , , , , | 2 Comments

Blog at WordPress.com.