Posts Tagged With: cake

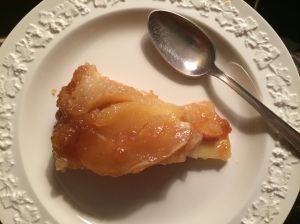
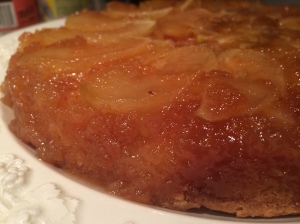
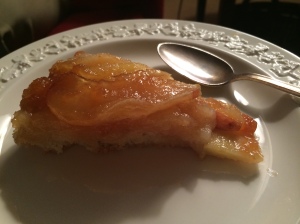
Caramelized apple upside-down cake

Photo Sep 21, 8 20 47 PM

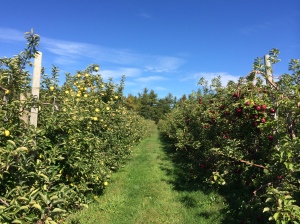
For some, pumpkin spice everything may be all the rage for those fall months when leaves spin slow to the ground and we shake out the coats and scarves so hastily hidden away with summer’s arrival.  But before flavored syrups and the facility of canned pumpkin, another fruit reigned over autumn: the apple.  A New England native, the apple is an automatic October symbol for me.  I think every elementary school student in the area has a field trip to a local orchard.  My town hosts at least five apple picking locations, each vying for some title of prowess – the best cider !  Apple cider doughnuts ! 10 different apple varieties !  Hay rides ! Pick your own ! It’s a glorious, fall-hued chaos that absolutely epitomizes the start of cooler weather, shorter days, and (perhaps most importantly) the baking season.

IMG_8059

Recently, apple pies were made and sold in the center of town and listening to everyone talk about the crust and the filling and the spices and the apples made me ALMOST want to eat pie.

But then I remembered.

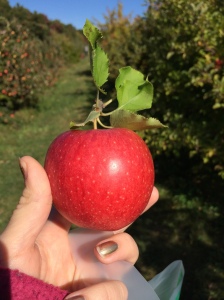
I don’t really like apple pie (a phrase not to be uttered in a town that thrives on apple consumption).  In fact, I really just like apples straight up and down: plucked from the tree, polished on my pants, and devoured with an excellent crunch and the occasional spatter.
IMG_8057

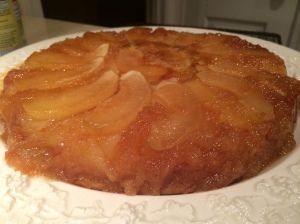
So what to do with this bounty of fruit so often relegated to pie filling ?  Oddly enough, the answer came from France, and more precisely from my home-away-from-home in the heart of Bourgogne.  During one of many Dijon visits, my friend’s mother brought out a gâteau aux pommes.  A “simple, family recipe – nothing special” with caramelized apples and a buttery cake that melts in your mouth.  Simple ?  Nothing special ?  Au contraire !  It looks and tastes both classy and purely of apples, as the ingredients can’t hide behind the spices of cinnamon and nutmeg so often paired with American desserts.  This upside-down caramel apple cake relies on sweet apples, butter, and sugar to create a winning dessert that looks chic but is easy to craft.

When I asked Brigitte if I could use her recipe, she sent me a scanned, handwritten version that included instructions such as “carameliser le moule” – caramelize the cake pan.  How…how does one do that ?  How does one even make a caramel, exactly ? As such, I have gone through and provided my “Americanized” version of the quantities and instructions.  While somewhat capricious, I have yet to entirely ruin this cake (and it’s becoming somewhat ubiquitous in my repertoire of apple-based dishes).  Head to an orchard and pick (or pick up) some Macoun, Gala, or Fuji apples and try your hand at this French family “gâteau.”

Ingredients (for the cake):

3-4 medium apples (Use a firm fleshed variety – no McIntosh !)
1/2 stick butter (+ 1 tbsp for the pan)
1 cup flour
2/3 cup granulated sugar
1 tsp vanilla
1 egg
1 1/2 tsp baking powder
2 tablespoons milk (more as needed)

For the caramel:

You can use a 1:3 ratio of water to sugar – I think I used 1/4 cup water to 3/4 cup sugar but any incarnation of this ratio is fine – if you have apples that are less sweet, use more sugar but you really only need enough to cover the bottom of a 9-inch cake pan.

Directions:

Peel and cut the apple into thin slices. Set aside – do not season with lemon thought you may be tempted to do so !  It is okay if they brown a little during the cake preparation process.

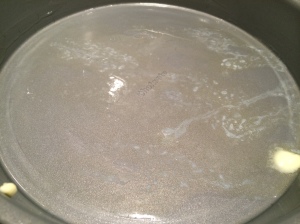
Liberally butter the interior of a 9 inch cake pan and set aside.  I place the pan on the stovetop over a warm eye to keep the caramel from hardening somewhat, but you do not need to do this.

Photo Sep 21, 7 02 33 PM

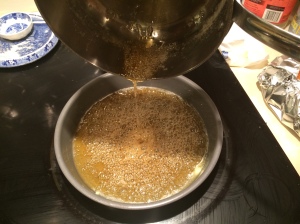
“Caramelize the cake pan” – yes, the infamous step. I interpret this as making caramel in a pan and pouring it into the cake mould.  Yes, we are going to make a wet caramel and no, don’t panic.

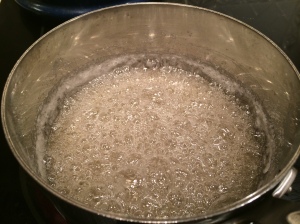
Put the sugar and the water in a pot on medium high heat.  Stir initially to incorporate the sugar into the water but once mixed, just leave it alone on the eye. Let it bubble until it turns a nice deep caramel color – you will see the sugary liquid change from clear, to a light brown, to an amber tone. Take it off the heat and carefully pour the hot caramel into your warm cake pan.  Be sure to cover the entire bottom of the pan (swirl as necessary).

Photo Sep 21, 7 01 34 PM

Photo Sep 21, 7 03 53 PM

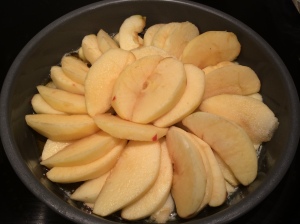
Arrange the apple slices in the caramel and be careful not to burn yourself !  The caramel may look pretty, but it is essentially molten sugar.  Your skin will not like it.  I like to place the apples in an attractive pattern but you do not need to take the time to do this – it’s your call.  Be sure to evenly place the apples around the mould.

Photo Sep 21, 7 06 40 PM

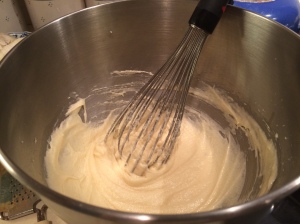
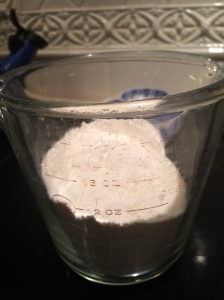
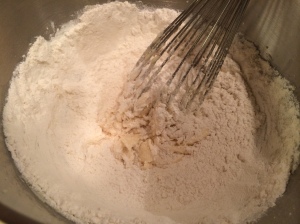
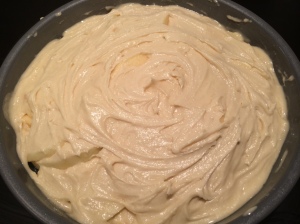
Once the apples are arranged, mix up the cake batter.  Soften your butter and whip it until light and fluffy.  Add the sugar and beat for 1 minute.  Crack the egg into the batter, pour in the vanilla, and mix again until smooth.  In a separate bowl, combine the flour and the baking powder.  Slowly add the flour mixture to the butter batter and mix until smooth – add the milk to thin the batter to a spreadable consistency.  Depending on the day and the temperature of the butter, I add more or less milk to the batter – start with 2 tablespoons and continue as necessary.

Photo Sep 21, 7 01 30 PM

Photo Sep 21, 7 01 53 PM

Photo Sep 21, 7 02 56 PM

Pour the batter over the apples and use a spatula to smooth the top of the cake.  Be sure to cover all of the apples !

Photo Sep 21, 7 11 42 PM

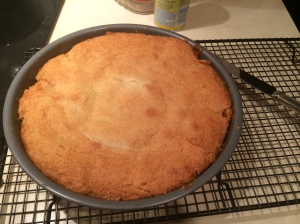
Bake for 30 to 35 minutes at 325F.  (Sometimes, I get impatient and increase the temperature to 350F…shh, don’t tell).

Photo Sep 21, 8 09 50 PM

Once the top of the cake is a nice golden brown, remove from the oven.  It is a dense cake – I usually touch the top to check for a little spring, but the cake is done when the middle is no longer jiggly.

Let the cake cool slightly – 10 to 15 minutes – before turning it out onto a plate.  This step is tricky – start by running a knife around the edges of the cake pan.  Then, place a plate over top of the cake pan.  Using oven mitts, in one movement flip the cake onto the plate.  Tap the bottom of the pan and slowly lift it up.  Don’t panic if a few apples have stuck to the pan – just put them back into place. As Julia Child (or perhaps Meryl Streep) said, “When you’re alone in the kitchen – who’s to see ?”

Photo Sep 21, 8 14 39 PMPhoto Sep 21, 8 15 14 PM

Serve warm or cool as dessert, a tea cake, or even (in my house) as breakfast !  Add a scoop of vanilla ice cream for an extra touch. Bon appétit ! 🙂

Photo Sep 21, 8 20 27 PM


Categories: Uncategorized | Tags: , , , , , | Leave a comment

Little Apricot Cakes

IMG_9698IMG_9673

When I was little (yes, quite literally much shorter than I am now), my mom always took me grocery shopping. As we would peruse Idylwilde Farms, I was often fixated by the candied fruit section.  I, of course, thought they were so pretty that they had to taste good.  One time, we purchased such apricots.

I ate one…

…and was pretty disappointed by the rest.  As a result, I lived a good portion of my life in opposition to apricots.  I’d only really eaten the dried and sugared variety, and the idea that fresh apricots existed never crossed my mind.

Until, that is, I went to France during the early summer years ago.  Apricots are everywhere and they don’t cost nearly as much abroad as in dear old New England.  Though hesitant to try, a friend of mine picked up the golden yellow fruit, peeled it into two deliciously orange and fleshy slices, and handed me one saying, “Essaie, goûte-le !” otherwise stated as TRY IT.

How could I not like it ?  The flavor bursts from the slightly furry skin, which adds a nice texture to a very soft and somewhat gooey interior.  It’s sweet and tart and easy to eat – you just place both thumbs where the step peeks out, press in and pull apart.  Perfect for a picnic.  As a result of this obsession started later in life, my mom sometimes buys fresh apricots (she claims to have always loved them.  I give myself some credit, however, since these fresh fruits had never shown up in the fruit bowl previously) and we race to finish them.  After indulging in a whole box of them from Trader Joe’s (at a very fair price, I might add), I decided to cook with them, stumbling upon this recipe for “little apricot cakes” in Bon Appétit (June 2013).  The recipe itself seemed great, but as a “true” apricot lover, I felt there wouldn’t be enough apricot implicated in the dessert’s design.  What to do, what to do…

When in doubt, make a sauce !  So I’ve paired these little cakes with a warm apricot compote and vanilla ice cream.  Think of it as…apricot shortcake !  Trust me, it was delicious and so easy to make, you might as well be blindfolded.

Welcome to the beginning of your apricot obsession.

Ingredients :

1 cup all-purpose flour
1 1/2 tsp baking powder
Pinch nutmeg
6 tbsp (3/4 stick) butter, softened
1/3 cup sugar
1 large egg + 1 yolk (I had one kicking around in the fridge to use up)
1 1/2 tsp vanilla extract
1/3 cup whole milk
3 apricots, halved, pitted, cut into wedges
2 tbsp sugar (raw suggested, I used regular)

Directions :

Line one standard muffin tin with cupcake liners (or grease liberally with butter – it’s your call).  This recipe will make 12 and only 12 cakes, so no need to neglect a space/fill with water.

In a medium bowl, combine the flour, baking powder, and nutmeg.  Whisk together to combine, then set aside.

IMG_9666

Beat butter and sugar in another medium bowl until light and creamy.  The butter should form lovely little floufs when lifted from the bowl.

IMG_9667

Add egg, yolk, and vanilla, mixing until smooth.  A little word to the wise – sometimes, a cold egg from the fridge will cause the lovely, smooth butter to stiffen and stubbornly refuse to mix.  As a general rule, it’s best to let all ingredients come to room temperature before combining…however sometimes (read: often) I’m lazy and don’t think that far ahead.  FEAR NOT if this happens to you !  The solution ?  Microwave your milk for about 30 seconds, giving it a shot of heat.  This will re-warm the butter and make him much more cooperative.  Seductive, no ?

IMG_9668

Moving right long, with mixer on low speed, add dry ingredients in 3 additions alternately with milk.  Bon Appétit asks that you begin and end with the dry ingredients – which chemically makes sense due to the baking powder – however I often ignore this advice and see no adverse side effects.  Just add both at the same time and mix well.  Scrape down the sides and mix one more time.

IMG_9671

Divide batter among muffin cups (cups will not be full) and smooth tops. Top with apricot slices and sprinkle with sugar.

IMG_9676

IMG_9680

Bake until cakes are golden and a tester inserted into the centers comes out clean, 20–25 minutes.  Don’t fret if it looks a little runny around the apricots; the fruits release liquid during cooking that give the illusion of uncooked batter.  Use a tester to be sure of doneness, but just don’t be alarmed if the apricot makes the top a little…soft.

IMG_9691

Transfer cakes to a wire rack and let them cool slightly before serving.

Apricot sauce :

5 apricots, pitted and quartered (keep the skin on)
1/2 cup water
2 1/2 tbsp sugar
3 tbsp cointreau
1 tbsp triple sec
Dash of ginger and nutmeg

In a small saucepan, mix the apricots, water, and sugar and set over medium heat.  Let the mixture come to a boil, stirring occasionally.  The apricots will breakdown as they cook; the softer they became, the more I mixed in an effort to separate as much fruit from the skins as possible.  Also – I enjoy the texture the skin offers and I find that in apricots, about 90% of the flavor comes from the skin.  If you would prefer a smoother texture in your sauce, it is easy to fish out the skins after cooking.

IMG_9686

IMG_9690

Once the fruit has broken down and you have a fairly thick sauce going, add the liqueurs, stirring after each addition.  Sprinkle the nutmeg and ginger over top – just a quick pinch for a little kick – and taste the sauce.  I cooked out most of the alcohol, looking rather for a little balance of orange flavors.  Naturally, if you want to leave a little bite in the sauce, let the sauce cool before adding a drip more cointreau.  The heat forces the alcohol to evaporate, allowing the softer orange flavors to remain in the sauce (which is what I preferred).

IMG_9694

To serve, I recommend cutting the cake in half, plopping a generous dollop of vanilla ice cream between the halves and smothering in warm apricot compote.  Nothing says June more than this “healthy” and bright dessert.

IMG_9700

As they say, bon appétit !

Categories: English | Tags: , , , , , , , , , | 2 Comments

Sour Cream Coffee Cake


I have a lovely friend, Zachary, whom I rarely see for more than 30 seconds at a time.  He has the most fantastic speaking voice I have ever heard, and for some reason, whenever we cross paths, I have a tendency to let out my New York accent (I hail from Boston, so this manner of speaking is entirely foreign and just a voice I imitate), singing “ZACHARYYYY !” from across the room/street/hallway/take your pick.  In order to spend a little more “quality time” together, he suggested brunch.  What to make, what to make….Ooh !  I know !

Cawfeee cake !

My mom used to make this when I was little and bring it over to the relatives’ place for Easter morning nibbles. I thought it would be an appropriate addition to the Sunday brunch spread, as it isn’t a light cake – made with sour cream, it’s very moist and delicious with (what else?) coffee ! (Or tea, if you prefer a little Earl Grey in your life).  The mixture of cinnamon, oatmeal, and sugar on top is divine – I often add more than the recipe calls for.  Also – I did not have pecans in my pantry BUT chopped nuts are a must (if you like them) as they bring a little texture to the cake.

For the topping:

1/2 cup granulated or brown sugar, or 1/4 cup each
1/2 cup all-purpose flour
3/4 teaspoon ground cinnamon
1/8 teaspoon salt
1/4 to 1/2 teaspoon ground nutmeg
1/4 tsp cloves
1/4 cup (1/2 stick) butter, softened
1/2 cup coarsely chopped walnuts or pecans
1/2 cup rolled oats

Put the flour, cinnamon, salt, sugar, cloves, and nutmeg in a small bowl and mix with a fork until crumble.  Add the nuts and oats and stir to combine.  Set aside.

For the batter:

2 cups all-purpose flour
1 teaspoon baking powder
1 teaspoon baking soda
1/2 teaspoon salt
1/2 cup (1 stick) butter softened
1/2 cup granulated sugar
1/2 cup brown sugar
3 large eggs
1 cup (8 ounces) sour cream or plain yogurt
1 1/2 teaspoons vanilla extract
A sprinkling of cinnamon

Preheat the oven to 350°F. Grease one 9-inch square pan,9-inch Bundt or tube pan, or 9-inch springform pan.  When I say grease, I am not joking,  Don’t skimp on the butter or the oil or the Pam when greasing this pan – my Bundt pan is old and dented and definitely not non-stick and I got my cake out just fine; however, know that it isn’t always easy given the nature of the topping.  You have been warned !

In a large bowl, beat the butter until smooth, about 1 minute. Gradually add the sugar and beat until light and fluffy. It’s not easy to do in a whisk – your arm will be sleepy – but it’s worth it as this smooth incorporation will affect the texture in a positive way later (light and fluffy!).

Beat in the eggs, one at a time. Blend in the sour cream and vanilla. Sift together the flour, baking powder, baking soda, and salt. Stir in the flour mixture, mixing until just combined.

Assembly :

Spread half of the batter in the prepared pan and smooth with a spatula to make it even and flat.

Sprinkle with half of the streusel mixture – again, smoothing with the back of a spoon to keep the layer relatively level.

Carefully cover with the remaining batter and…

…sprinkle with the remaining streusel.

Bake until the cake is golden and pulls away from the sides of the pan, about 50 minutes. It takes a long time to cook, but you’ll smell it when it is done – the top may also crack a little bit.  Set on a rack and let cool in the pan for at least 15 minutes. To remove from the Bundt pan, “run” a knife around the edges (really, just poke knife down the sides and lift a small bit all the way around the cake pan).  Turn the cake out onto a plate and tap the bottom.  If it doesn’t come out, run the knife around the edges again.  Tap tap tap. It should pop out with a little patience.

I prefer to serve this warm with a hot beverage but it’s just as good cold.  Gather your Sunday morning buddies, give them a cawl for cawfee cake and have a bawl !

Bon appétit !

Categories: English | Tags: , , , , , , | Leave a comment

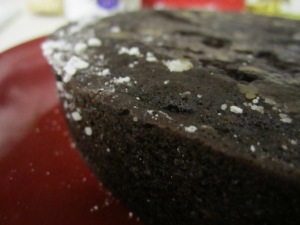
Vegan Chocolate Cake with Blackberry Filling and Spiced Chocolate Buttercream

Yes, you read the title right.

Vegan chocolate cake.  Vegan buttercream.  Vegan dessert.

I think I am probably the most omnivorous person around – I really love all types of food.  Meat, milk, fish, vegetables, sugar (obviously)…the list goes on.  Baking with limitations, therefore, is not my forte.  However, one of my closest friends is vegan, choosing to eliminate all sorts of ingredients commonly found in sweet delights from her diet (which totally amazes me.  I could never do it, so PROPS TO YOU, Miss Bailey !).  When her birthday rolled around, I was DETERMINED to concoct a vegan-friendly dessert…for what is a birthday without cake ??  Though it was definitely an adventure for me (the ingredients list is more exotic than normal…did you know vegan butter exists ?!  Super cool !), the end result was pretty tasty – I would definitely make the cake again.  While I’ll admit that it feels strange to make a cake without eggs, the texture is exactly the same as any chocolate cake I’ve ever eaten and I bet a blind taste test would fool you.

In order to make the cake a little interesting, I chose to fill the center layer with blackberry jam and add spices to the frosting – there is nutmeg, cinnamon, and cloves added to the frosting to bring in a little texture and round out the cocoa flavors.

Give it a try – you’ll be pleasantly surprised.  🙂

For the cake :

2 cups all-purpose flour
3/4 cup natural cocoa powder
2 teaspoons baking soda
1 teaspoon baking powder
1 3/4 cup unsweetened soy milk
2 teaspoons red wine vinegar
1 2/3 cups sugar
1 cup olive oil
2 tablespoons vanilla extract
A few shakes of cinnamon

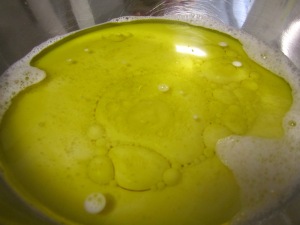
Preheat the oven to 325˚F. Grease two 9-inch round cake pans and line them with parchment paper.  Combine the flour, cocoa powder, baking soda and baking powder in a large mixing bowl and stir to combine. In a separate bowl, whisk together the soy milk, vinegar, sugar, oil, and vanilla. I know, it looks a little odd – vinegar and olive oil usually connote salad dressing – but I promise it works out in the end !

Pour the milk mixture into the flour mixture and stir with a spoon until well combined.

Spoon or scrape the mixture into the prepared cake pan and bake for 40 to 55 minutes.  You’ll know it’s done when you smell the cake and a fork comes out clean.

Run a knife around the edges of the pan to loosen before inverting the cake onto a wire rack (or if you are a lowly college student, on a plate dusted with confectioners’ sugar) to cool.

For the filling :

Blackberry jam – I used about 1/3 of a jar….but this part is entirely subjective – use as much or as little as you please.  Also, I think that raspberry jams would be DELICIOUS in place of blackberry.

For the frosting :

1/2 stick vegan butter
2 cups confectioners’ sugar
1 cup cocoa powder (more or less depending on your love of bitterness)
1/4 cup soy milk
1/2 tsp vanilla
1/4 tsp nutmeg
1/2 tsp cinnamon
1/8 tsp cloves

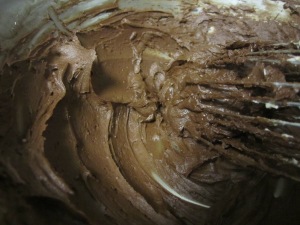
In a large bowl, whisk the vegan butter until it’s creamy.  Add the cocoa powder first, blending slowly until well incorporated (start slow simply to avoid cocoa powder explosions…that fine dust tends to make me sneeze when it clouds the air).  Add the vanilla and the powdered sugar, adding the soy milk when necessary to assure a good texture. Add the spices last.

Make sure to taste along the way to make sure everything is to your liking – I gave my ratios of spices BUT THEY ARE APPROXIMATE as I tend to make it up as I go, adding a dash of this and a dash of that until I find the taste I prefer.  It’s good to be spontaneous.  🙂
Assembly :

First, center one layer of the cake on a plate that has been dusted with powdered sugar.  This will be useful when the time come to cut the cake, as each slice will be easy to remove.

Using a flat metal spatula, (or a knife…again…I lack proper tools) spread a very thin layer of the frosting on the cake.  As we are going to add jam, this thin coating of frosting will keep the cake from going soggy on the inside.

Once evenly distributed, add the jam, spreading with the back of a spoon.  I love jam, so I was rather liberal with the amount I put on the inside…it is your call.

Prepare the second cake layer by spreading another thin layer of frosting on the side that will touch the jam.  Once ready, flip this layer onto the jam layer. It’s a process but it isn’t that difficult – if you miss, just pick the cake up and put it back on.  No harm done !

Cover the rest of the cake with the frosting.  Dust the top with a combination of the spices used in the frosting – it looks classy and tastes good, too.

We obviously decorated ours with candles….

Happy Birthday, Bailey & Ambika and bon appétit !


Categories: English | Tags: , , , , , , , , , | 1 Comment

Chocolate Raspberry Crunch

My sibling loves chocolate.  In fact, I think she loves chocolate more than anything else on the face of the planet.  Except for stuffed animals.  And Doctor Who.  Maybe.   In any case, she celebrated her birthday just the other day and I was (naturally) in charge of the cake.  She told me she wanted chocolate and raspberry to be involved…but other than that, I had free reign.

In all honestly, I was just going to make a straight-up double-chocolate cake with raspberries on top.  You know, chocolate cake, chocolate buttercream, raspberries.  BOOM.

But…then I got to thinking.  I could make a raspberry filling.  Hmm.  And all that chocolate needs some variation.  Maybe I could make a feuilletine-type layer, with a little crunch for “texture,” as they say on all of those fancy cooking shows (that I adore watching).

And we were off to the races.  I ended up making two round layer cakes of regular chocolate cake.  I cut each layer in half and put a different filling on each layer, one being a chocolate cookie crunch (feuilletine), a raspberry buttercream, and a dark chocolate raspberry ganache, finally smothering the entire gateau in chocolate buttercream. And lining it in fresh raspberries.

Yes.  I know.

Need I add that it was about 90F outside and there is no AC here in da kitchen.  The chocolate melted all on its own….

I don’t really have a name for this cake…so “Chocolate Raspberry Crunch” is a working title.  Any suggestions are MORE THAN WELCOME .  Also, given the experimental nature of this cake, I do not have specific measurements for the fillings.  I’ve given approximations, but know that you may need to change the amounts if you (dare?) attempt this delicious, decadent and dangerous torte.

For the cake : look on the back of a Trader Joe’s cocoa box !

3 1/2 cups flour
3 cups sugar
5 eggs
1 1/3 cups cocoa
1 tbsp baking soda
1 tsp salt
12 oz butter
3 cups milk
1 tsp vanilla

 Preheat oven to 350F.  Prepare two 9-inch round cake pans.  Know that this cake does sometimes make extra batter – the pans I normally use are a little small, so I often have a little leftover.  If you use pans with a removable bottom (like I did this time), all the batter will fit.
Crack the eggs into a large bowl.  Cream together the EGGS and the SUGAR until you reach the ribbon stage.  For more information on ribboning, please scroll down to the Fraisier post.  🙂 Add the milk and vanilla and mix until smooth.
In medium pot, melt the butter and stir in the cocoa powder until it looks like velvet.  Yes, velvet.
Mix together the flour and the baking soda in a large bowl.  Add this to the egg mixture at the same time as the chocolate, as if you were making brownies.  Stir until uniform and incorporated – about 2 minutes.  TASTE:  It should taste like chocolate.  This is my one big critique of chocolate cake :  it often doesn’t take enough like chocolate, so I end up adding more cocoa…
Pour the batter into the prepared pans and place in oven.  Let cook for about 45 minutes or until springy to the touch.  Remove and let cool.

For the feuilletine :

A handful of chocolate chips…
Some butter….
A bunch of butter cookies (shortbread, waffle cookies – anything crunchy with a vanilla-type flavor.)

Prepare a jelly roll pan by covering it with tin foil (or parchment, or wax paper…whatever you prefer).  I placed mine in the freezer to cool it off.

Put the cookies in a small plastic bag and beat with the back of a spoon until nice and crushed.

In a separate pan, melt the butter and the chocolate chips, stirring until smooth.  Pour the cookie crumbles into the pan and stir until they are covered in chocolate.

Pour the chocolate mixture on top of the jelly roll pan and, using the back of a spoon, spread it until it is as thin as possible.  I made mine into a circle, guestimating the size of the 9” pan.  Place this in the freezer to chill/set.

For the raspberry buttercream :

Raspberry syrup (seedless)
Butter, soft
Confectioner’s sugar

In a large bowl, cream the butter.  Add the raspberry syrup and taste for raspberry flavor.  Add sugar until the butter taste has diminished.  Set aside.

For the dark chocolate raspberry ganache :

Another handful of chocolate chips
Cream
Raspberry syrup

In an effort to minimize dirty dishes, I re-used the pan in which I melted the chocolate for the crunch layer.  If you do the same, start by adding the raspberry syrup and whisking over high heat.

Bring that syrup to a boil.  Add 1 tbsp cream and continue whisking.  When hot hot hot, remove from heat and add the chocolate chips.  Let sit 1 minute before whisking together to combine.  Add another tbsp cream and taste.  It should taste like a lindt raspberry truffle.

Add more chocolate or raspberry or cream to adjust the flavor as you like it.  The mixture of the syrup and chocolate is surprisingly forgiving and can take a fair bit of variation.  Let cool in the fridge.

For the chocolate buttercream:

1 1/2 sticks butter, soft
1 1/3 cups cocoa
Powdered sugar
Cream (for texture)

In a large bowl, whisk the butter until light and creamy.  Add the cocoa and whisk again.  Add sugar until the frosting is as sweet as you like.

I make a very bitter frosting – I really like the deep and strong flavor of cocoa powder, so I avoid adding a lot of sugar.  In fact, little note for everyone : when recipes state how much powdered sugar to add, I usually halve it.  Too sweet !

Assembly:

This is a little tricky.  First, cut both layer cakes in half.  Place the bottom layer of one of the cakes on a large, flat cake plate.  Get the crunchy layer out of the freezer and (bring to room temperature if possible.  I didn’t have to wait long given the suffocating temperature of the kitchen) and place the empty cake pan overtop.  Cut the feuilletine down to size, nibbling the leftovers.  Place the chocolate layer on top of the cake and then peel the foil (or paper) off. Place the second cake layer on top.

Grab that raspberry buttercream and spread that on top of the next layer.  Leave a border without frosting – it will leak out as you put the other layers on.  Cover with the third cake layer.

Remove the ganache from the fridge and bring to room temperature – though highly viscous, it should still flow.  Pour overtop the third layer of cake, again leaving a little border by the edge so that it will ooze properly.  Cover with the final layer of cake.

Get the chocolate buttercream and cover the cake, being sure to spread overtop the sides before adding more to the top.  Decorate with raspberries.

CUT AND SERVE, preferably with a glass of ice cold milk OR fresh-brewed coffee.

Bon appétit !

Categories: English | Tags: , , , , , | 4 Comments

Flag Cake (for lack of a better title…)

For the Americans poking around my blog, yesterday was Independence Day – a moment where the USA likes to tout its freedom and principles and set off fireworks (which is pretty entertaining).  I’m not hugely patriotic and therefore am not entirely invested in this national holiday HOWEVER when my sister brought this cake to my attention, I couldn’t say no.  It’s an ordinary, white, frosted cake on the outside…but a rockin’ STARS AND STRIPES (well..no stars…details details) gâteau on the inside !

The actual source site for this “flag cake” à l’américaine doesn’t list recipes, so I used my own creations listed below. Again, this cake requires some serious dedication – you have to WANT to sculpt and craft this dessert, spending much time cutting and placing before being able to actually devour the final product so don’t tackle this project at 8pm.  You’ll be busy until the wee hours of the morning.

A little note on the cakes :  The white and blue layers, both the same size, were made of the same base : a Lady Baltimore cake.  It’s a light, almond-flavored white cake that is easy to cut and handle given the egg whites.  The red layer was a raspberry yellow cake recipe – this way, we didn’t waste any part of the egg, utilizing the yolks in this cake recipe that remained from the Lady B cake.  I added Chambord and raspberry jam to help both with the color of the cake and give it that raspberry flavor.  The frosting is an almond buttercream.

For the RED CAKE : 

1 cup sugar
1/2 cup butter
3 egg yolks
1-2 tsp vanilla
2 cups flour
2 tsp baking powder
3/4 cup milk
1/2 cup jam
3 tbsp Chambord (raspberry liqueur)
LOTS OF FOOD DYE.

Preheat oven to 350F.  Line two 9-inch pans.

Cream the butter and sugar together until light and fluffy.  Separate the yolks and whites of three eggs.

Add the vanilla, followed by the egg yolks.  Beat well after each addition until the batter is nice and…homogenous.

Add the milk and flour together, stirring until just combined.  Add the jam and the chambord and the food coloring, mixing until the red is well-distributed throughout the batter.

Pour into prepared pans and bake until springy to the touch – about 20 minutes.

For the WHITE and BLUE cake :  

1 stick butter
1 1/4 cups sugar
1 tsp vanilla
1/2 tsp almond
1 3/4 cups flour
3/4 cup milk
3 egg whites (4 will make the cake rise more)
2 1/2 tsp baking powder

Preheat oven to 350F.  Cream the butter and sugar until light in color.

Add the vanilla and almond extracts.  Mix in the flour, baking powder, and milk at the same time, being careful not to over mix.   Set this bowl aside.

In a clean bowl, beat egg whites until stiff but not dry.  You can add salt or cream of tartar to the whites in order to help them whip up…but I usually skip that part.

Fold the egg whites into the batter.

Fill the white cake pan with batter.  To the remaining batter, add LOTS AND LOTS OF BLUE FOOD DYE.

Mix until combined; pour the blue patter into the cake pan and place both pans in the oven.  Let cook until springy to the touch – about 20 – 25 minutes.

For the frosting :

1 1/2 sticks butter, softened
about a whole bag of confectioners’ sugar (slightly less…leave about 1/3 cup in the 1 lb bag)
Vanilla (about 1 tsp)
Almond extract (to taste – probably about 1 tsp)

Beat the butter until nice and creamy.  Add the sugar, watching the consistency.  Throw in the extracts.  Taste LOTS AND LOTS AND LOTS to make sure it isn’t too buttery/sugary/etc.  If you find it to be too thick, add some milk – about 1 tbsp.

Assembly :

This is the complicated part.  I had a hard time getting my mind around it…hence, my sister was the brains of the operation.  I just obeyed.  Here are her lovely orders :

1. Using the lid of a canister of oatmeal (a circle between 4 to 5 inches in diameter), cut the BLUE LAYER so the it looks like a doughnut.  Use this same circle to cut one of the RED LAYERS down to size.  This RED LAYER will fit inside the blue layer.

2. Cut the other red layer IN HALF – you can do this by using a wire like we did OR with a serrated knife.  It’s a little stressful, but these cakes are tolerant of cutting – yay eggs !

3. Cut the white layer in half, too.

4. Take ONE of the thin white layers and cut it to the size of the smaller circle.

5.  On the cake pan, lay the thin red layer first.  Spread a thin thin thin layer of frosting on the red layer.  Cover with the thing white layer and some frosting.  Then the red layer.  THEN THE BLUE DOUGHNUT, followed by the thin, small, white layer and then the small red layer.  Here are some photos to help you visualize all of this.

6. Ice the entire cake.  Yum.

We put some blueberries on the top for decoration, but it’s fine all on its own, too.  The layers of the cake work really well together and who doesn’t love a good surprise ?


Happy (belated) Independence Day and bon appétit !


Categories: English | Tags: , , , , , , , , , , , , | 1 Comment

Tiramisu Cupcakes

Tiramisu.  Famous cake.  Fancy cake.  The cake that never really made sense to me (but I always just accepted it because my mother likes it).  I’m pretty sure my dad likes it, too.  Moi ?  I’m not sold.  I never understood what was so appetizing about cookies soaked in syrup with a little whipped cream – the texture was strange, the taste felt wrong, and the temperature never correct.  However, a little mouse showed me a beautiful photo of Tiramisu cupcakes, suggesting I make them sometime.  (Yeah. Right. Sure. I don’t like this dessert, remember ?)

But they seemed so cute.  And approachable.  And oddly…intriguing.  So I skimmed a multitude of blogs to compare recipes and ideas and techniques and put together my own recipe for this Italian sweet.  I made a few changes that are IMPORTANT :  There was no rum involved in this cake.  No cookies, either.  The cake batter is spicy – not just vanilla.  The result ?  A fantastic and surprisingly LIGHT cupcake that made for a perfect breakfast sweet with coffee, an equally good teatime accoutrement, and a delectable (and beautiful) after-dinner dessert.  The cake is not too sweet and has a nice bite from the nutmeg, which sings with the use of frangelico, a hazelnut liqueur, otherwise known as the reason why the rum is GONE.  A little tip : ice these cupcakes as you go – the whipped cream frosting will otherwise make the cupcakes soggy and potentially make a large mess.  Furthermore, if you ice those babies, you’ll have to store them in the fridge…which will dry them out.  Avoid this if possible.  This recipe makes enough for 18 cupcakes (give or take).

For the cake :

2 1/2 cups flour
1 1/2 tsp baking powder
1/2 tsp salt
1/2 cup milk
1 stick (1/2 cup) butter
2 tsp vanilla
6 eggs + 3 yolks
2 cups sugar
Pinch of cinnamon
Pinch of nutmeg
Cocoa powder (for dusting)

Preheat oven to 325F.  Line 2 muffin tins with paper liners.  Whisk together the flour, baking powder, cinnamon, nutmeg, and salt.  Set aside.  Heat the milk and butter over the stovetop (on low heat – DO NOT LET BOIL) until melted.  Stir in vanilla extract.

Mix together the egg yolks and eggs with the sugar.

Be sure to beat these ingredients until the eggs go from a deep, golden yellow to a light, lemony color.  This stage is called the “ribbon stage” – you’re there when you lift up the whisk and the yolks drizzle off in a long, thin stream – like a ribbon.  Clever, no ?

Fold the flour mixture into the egg mixture in three batches. If the butter/milk combination is VERY HOT, mix about half the batter into the milk and then fold that mixture into the rest of the batter – this will prevent the eggs from cooking.  If the milk is at room temperature, you can simply add it slowly to the batter, stirring until JUST combined.

Pour the batter into the tins and cook for 20 minutes.

For the syrup :

2/3 cup STRONG coffee (or espresso)
5-8 tbsp Frangelico
1 tbsp sugar

Combine all ingredients over low heat until the sugar is dissolved.  Let cool.

For the frosting :

1 1/2 cups heavy cream
12 oz mascarpone cheese
1 cup confectioner’s sugar

(Before making the frosting, place the mixing bowl in the freezer to chill – this will help whip up the heavy cream.)

In a large bowl, whisk heavy cream until stiff and peaks form.  In another bowl, whisk together mascarpone and sugar until smooth.  Gently fold the whipped cream into the mascarpone mixture until incorporated.

Assembly :

When the cupcakes have cooled, brush the tops with the coffee syrup.  I had a little runt cupcake that I used for testing for the syrup – I recommend sacrificing a cupcake (pick the ugly one) to sample.

Repeat this process until all of the syrup has been used.  Allow cupcakes to absorb liquid for several hours (eg 3.  But.  If you are impatient…it’s okay.  Nothing bad happens to those who nibble.)

Frost the cupcakes and sprinkle with cocoa powder.  EAT !

Buon appetito !

Categories: English | Tags: , , , , | 4 Comments

Three King’s Cake

A few weeks ago, my roommate and I had a BRILLIANT idea…a brilliantly tasty idea.  As it was close to Epiphany, we thought we would make a Three King’s Cake – or “galette des rois” in French.  This “cake” is more like one large turnover, made with puff pastry and a frangipane filling.  Frangipane is a sweet, almond and sugar combination that is used in pies or tarts…I used it as the base of an apricot tart once.  It’s similar to the filling of streudel or other breakfast pastries.

In any case – there is a tradition that goes along with this cake : inside, one hides a bean or a coin.  Once the cake is cooked, cut, and distributed, the person who ends up with the coin is considered the “king” or “queen” of the evening.  In French culture, upon cutting the galette, the youngest child hides under the table and announces who receives what piece…and everyone wants to find the coin.  For those of you who want to learn moreeeeee click here.

So Pauline and I, together, in our (poorly equipped…) college community room, prepared this treat for a few French (and American) friends…I’ll admit, Pauline was the workhorse behind this recipe as I had never made a King’s Cake…but I got to place the coin (we used a piece of pasta…) in the cake.  It’s a really simple recipe that doesn’t take much work and it is definitely worth noting.

So even though Mardi Gras has passed by…as has Epiphany and we are now in Lent and you probably gave up sweets (pity…) – this would be an excellent addition to breakfast with a cup of hot coffee, no crowns necessary.

________________________

Ingredients :
– 2 sheets of puff pastry
– 1 1/4 cup almond flour/meal
– 1/3 cup sugar
– 1 egg
– 3 1/3 tbsp butter, softened
– 1/4 tsp almond extract
– 1 egg yolk (for painting the dough)
– 1 coin/bean

Preheat oven to 400F. If the puff pastry is frozen, allow it to thaw completely before unwrapping.  If you don’t wait, it will just break.  Take one sheet and press it into the cake pan, cutting it to size .  With a fork, score the pastry (basically cover it with holes).  This will allow steam to escape when cooking and decreases the chance for air bubbles…which while they might look cool don’t do anything for flavor…they’re full of hot air.  😉

In a bowl, mix together all of the ingredients – the almond powder, the sugar, the egg, the softened butter and the almond extract.  I suggest putting the butter in first, followed by the sugar, the eggs, the extract, and the finally the almond flour.

Pour this mixture on top of the puff pastry, making sure to spread the filling evenly.  It would be wise to leave a small border  devoid of filling – this will make sealing the pastry easier.  Put a bean, coin, or small NOT HEAT SENSITIVE object somewhere in the filling, preferable near the border so that you don’t cut it accidentally.  We used a pasta…in hindsight this was probably not the wisest choice as our “fève” was eaten !  We never found out who the King was (or queen, as there were only females present for most of the nibbling process…sorry Matt !) and therefore just decided it was a mystery.

Using the second piece of puff pastry, cover the filling and make sure to pinch the edges well.  Again, cut the piece of pastry to fit the mould – no need to have TOO much excess as it will just take longer to cook.

To make the top an even (and beautiful) golden color, take the yolk of an egg and mix it with a small amount of water.  Paint the top of the cake with this mixture.  Then, score the top with a fork just like you scored the bottom piece.

Cook for about 30 minutes – just enough time for the top to be golden brown.

Wait for the cake to cool a little, then cut the cake !

Categories: English | Tags: , , | Leave a comment

Apple Cider Bourbon Cake

**Before you read on, please take a look at my note regarding English/Metric measurements.


For Christmas, my family asked me to take care of dessert – typical, given that I love sweets.  In keeping with their request, I decided to make a warm apple cider bourbon cake.  It’s a simple, moist gateau topped with an apple caramel that is best served with ice cream and perhaps a cup of tea (or a little sip of calvados…or pommeau….).

_____________________

Apple Cider Bourbon Cake

Ingredients :

SAUCE
4 cups apple cider
3/4 cups bourbon
1/2 cup dark brown sugar
1/3 cup dark corn syrup
3 tbsp cider vinegar
3 tsp cinnamon
1 to 2 tsp vanilla extract
1 cup heavy cream

CAKE
2 cups flour
1 tsp salt (if you use salted butter, you need not add the salt)
1 tsp baking powder
1/4 tsp baking soda
1 cup apple cider
3 tbsp canola oil
1/2 cup bourbon
7 tbsp butter
3/4 packed brown sugar
1 tsp vanilla extract
2 large eggs

Ice cream for serving

The timing of this cake can be a little tricky.  The sauce needs to be prepared FIRST as it constitutes a layer of the cake as it cooks.  The sauce will take at most 45 minutes, less depending on the strength of your stovetop.

FOR THE SAUCE :

In a large pot (with tall sides), combine the cider, bourbon, brown sugar, corn syrup, vinegar, cinnamon and vanilla and put over medium high heat.  I suggest that you microwave the corn syrup to make it easier to pour…since it can be very stubborn and refuse to pour out of the measuring cup.  Stir all of these ingredients together until the sugar has dissolved and the entire mixture comes to a boil.  Allow it to bubble for about 10 minutes.  Then, add the heavy cream and reduce the heat slightly to prevent the mixture from curdling or separating.  Allow the caramel to boil for roughly 25 minutes.  The sauce will thicken and the bubbles will take on a glassy sheen.

Once you have reached this point, the caramel sauce is ready and can be removed from the heat.  As it cools, it will thicken more.

FOR THE CAKE :

Preheat the oven to 350 F. Line a 9-inch round cake pan with parchment paper (I trace the pan and then cut the paper to size) and cover the sides with butter.  In a large bowl, combine the flour, salt, baking powder and baking soda (cinnamon as well for those that like a little extra spice).  In a glass measuring cup, mix the apple cider, canola oil and bourbon.

Cream the butter in the mixmaster (or if you are like me and sans mixer, use your whisk and mix until the butter is light and fluffy).  Add the brown sugar and vanilla and continue to whip the butter until it has lightened in color.  Beat in the eggs one at a time, making sure everything is well incorporated before adding the second egg.

Add the flour mixture with the cider mixture, alternating one with the other until it has been completely mixed in.  You will want to turn the mixmaster to it’s slowest speed to avoid a flour cloud.  If using a whisk, simply stir, do not whip, for best results.

TASTE.  If the batter doesn’t taste good, the cake won’t either.  If you like more bourbon, this is the time to add it.  I often put more in than I have noted above (but not much !) as the alcohol cooks off in the stove.  The same goes for cinnamon and vanilla.

Spread 2/3 of the batter in the prepared cake pan.  Drizzle in a circular motion, moving from the center of the cake outwards, the caramel mixture that was made earlier.  You made need to reheat it – do so over the stove on a low setting to avoid separation.  IF THE CARAMEL SEPARATES – have no fear !  It will taste just as good – simply make sure you mix it well before serving.  In any case, once the batter has been covered with a layer of caramel, put the remaining third of batter on top, being careful not to blend the three distinct layers together.

The cake pan will be very full, so I often place the cake pan on top of a cookie sheet just in case it overflows…this way you avoid a big mess in the oven.  The cake will cook for about 40 minutes or until springy to the touch (and a lovely golden brown color on top).  Let cool for 10 minutes in the pan before running a knife around the edge and inverting the cake onto a cooling rack.  When ready to “ice” and serve, remove the parchment paper and place on a platter (I used a cake stand but I often just use a plate).  Warm the remaining caramel and pour 1/2 over the top of the cake.

To serve, cut cake and pair with a scoop (or more…) of vanilla ice cream.  Pour a spoonful of the remaining caramel sauce over the cake and ice cream and enjoy !

Bon appétit !

Categories: English | Tags: , , , | Leave a comment

Create a free website or blog at WordPress.com.