Posts Tagged With: caramel

Oh crêpe !

IMG_1498

I know in America, we use the beginning of February as an excuse to kick a groundhog out of his home and either 1) scare him upon the sight of his shadow or 2) leave him complacent with no shadow to scurry back into his burrow.  This isn’t the only holiday happening at the end of January…it’s also Candlemas !

I realize this isn’t a common exclamation.  My roommates cocked their heads in wonder as I uttered such words.

Candlemas isn’t really much to celebrate for anglophones, but the French tradition is actually pretty “chouette.”  Known as the fête de la chandeleur – otherwise known as crêpe day – it’s a grand excuse to eat these thin pancakes with any number of fillings while sipping on hard cider, a drink once extremely popular in the USA (more popular than milk…and the #1 beverage in Massachusetts) but now less well known.  The origins of such a culinary combination are dubious, but many say the crêpe symbolizes the sun, and the celebration of la chandeleur falls on a pagan day recognizing the return of longer, sunnier days – rather like the solstice.  Legend has it that if you can flip the crêpe with one hand, holding a coin in the other, you will be financially blessed for the coming year.  (We didn’t try that combination, but I managed to half-flip my crêpe once…)

In order to properly devour lots of crêpes, we invited friends over (and a few Frenchies – Laurent and Jérôme) to celebrate en masse the “end” of winter.  Potluck-style, I supplied the crêpes while the guests were asked to bring cider or fillings.  Strawberries, raspberries, blueberries, caramel, speculoos, nutella and ice cream graced our kitchen table…as did four saladiers worth of crepes !

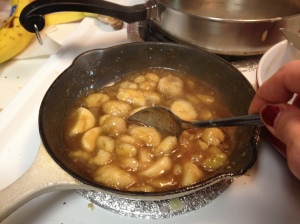
In a final twist, I made a “bananas foster” crepe complete with stewed bananas in a bourbon caramel sauce.  Oh the spontaneous accidents that happen in a happy kitchen !

IMG_1491

Crêpes take all of five minutes to whip together and they cook just as fast – serve them as a savory meal (filled with potatoes and cheese and salmon and herbs….or ham and cheese…or anything really) or as a nice breakfast or even as dessert.  You can’t go wrong with this simple pancake as your canvas.

Crêpe batter :

2 1/4 cups flour
2 cups milk
2 eggs
3 GENEROUS tsp sugar
1 tsp vanilla

Oil for the pan (we used a little veggie oil)

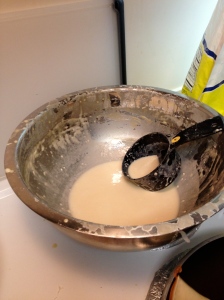
In a large mixing bowl, combine the eggs, milk, and vanilla and whisk well.  Add the sugar (if you want – it’s not required) and the flour and whisk until the batter is smooth and without lumps.  Let the batter sit for about 10 minutes.  We didn’t REALLY have the time to let it rest (hungry people must be fed !) but in theory it’s wise to let the ingredients mingle. I think this removes some of the bubbles from the batter (allows them to rise to the top) so that one doesn’t have air pockets in their crepes.

IMG_1477

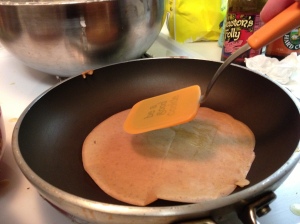
Pour the batter into the center of a round pan, tilting the pan in order to make an even, thin crepe.  Be sure to use a spatula to gently lift the crepe from the bottom of the pan in order to prevent further sticking. You can try your hand at flipping without a spatula…or you can just use a spatula because that’s a foolproof way !  Flip the pancake and let those little brown pockmarks form – it’s better if they have a little brown on ’em (adds some flava !)

IMG_1479

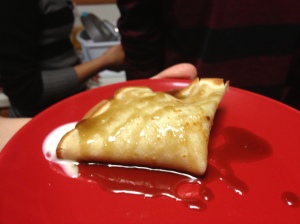
Put on a plate and cover with whatever you want – I like speculoos – and either ROLL like a cylinder or fold into quarters.  If it’s very full, folding is the wisest choice.  If you have a thick filling, like nutella, then rolling will suit you just fine.

Devour in between swigs of cider !

IMG_1499

Bon appétit ! 🙂

Categories: English | Tags: , , , , , , , , , , , , | 2 Comments

Macarons

Sometimes, we want to challenge ourselves.
See just how far we will go to accomplish a task.
The recipe in question : Macarons
The challenge : How to make them with only two bowls, a measuring cup, and a whisk as our tools.  In other words : the old-fashioned way.

Ah the joys of living in a dorm…

Macarons (yes, macarons, not macaroons because we are not fussing around with coconut!) are adorable and intimidating, two words I don’t usually like to see together.  They seems to be difficult, imposisble even to prepare, but really – they are just a meringue with a filling.  There is nothing scary about that – leave it to the dear français to make something seem more difficult than it is…

Here in America, these confections have quite the reputation : very few folks know how to make them because they just seem HARD.  I didn’t even know what went in them, let alone that it was just meringue.   However, with Pauline as my guide, we decided to tackle the classic French cookie.

She explained to me that they were in fact simple that she had already made them (successfully) before and that of course we could do it.

SURPRISE !

As we are attempting to whip egg whites by hand and prepare a simple boiled sugar solution, the panicking begins.  “We can’t whip the egg whites enough, this is never going to work, they won’t be perfect, we’re a failure…”  She may be a little pessimistic but I still love her dearly.

Aha.  Quite an adventure.  However, we survived.  Here as a witness, I am going to prove that macarons are really not so scary or difficult to prepare – they just require a lot of optimism and patience and perhaps a little luck.

Off we go !

______________________________

Ingredients :

3 egg whites
1 1/4 cups confectioners’ sugar
1 3/4 cups almond meal/powder/flour (found at Trader Joe’s)
3/4 cup granulated sugar
1/2 cup water

Pour half of the egg whites (you will have to approximate – 1.5 egg whites) in a large bowl.  With a whisk, whip the egg whites until they are stiff.  If you do this by hand, you will be sore by the end – and do not be alarmed, it does take a little while to whip the eggs to this point.  I recommend taking turns if you are lucky enough to have a cooking buddy.  You should be able to turn the bowl you are using upside-down without having the egg whites fall out/budge. The proof is in the pudding…or the egg whites…as here’s a photo (not staged at all…) of our final product:

Set these egg whites aside for the moment.  In another bowl, mix the almond powder and the powdered sugar.  Add the remaining egg whites and stir until well combined.  If you want to add vanilla or another flavoring to the mixture, do so now.  When complete, set this bowl aside as well.

Now we arrive at the complicated step.

What is going to happen now is really fun but can be challenging if you are alone in the kitchen (or if you have never worked with molten sugar).  We are going to make a basic marshmallow – it’s like “Quick White Icing” for those who are familiar with the classic Joy of Cooking.  A sugar syrup will boil on the stove top to a certain point, and it will be then added slowly to the eggs whites all while whisking the egg whites into a frenzy.

Mix the water and the sugar together and put over the stovetop.  If you have a candy thermometer, you will boil this mixture until 238 degrees F, or the soft ball stage.  If you don’t, just watch the mixture – it will change consistency to be come glassy and slightly thicker.  Remove from the burner.

Grab the bowl with the whipped egg whites and prepare the whisk.  One person should be in charge of whisking while the other carefully pours the syrup into the egg whites. If you are using an electric mixer, set the mixer on HIGH and hold the pot over your head while pouring in the syrup.

The sugar must be added in a long, thin stream so as to prevent the egg whites from cooking given the temperature of the sugar (and the tendency for sugar to continue cooking even when removed from the eye).  The mixture will thicken and turn glossy.  Beat until warm to the touch.

NB: BOILING SUGAR IS VERY HOT AND IF YOU BURN YOURSELF IT WILL BE PAINFUL.  So please be careful.

Just for reference’s sake, here’s a photo of the marshmallow fluff :

Add the marshmallow to the batter one third at a time, making sure that everything is well incorporated BUT not mixing too much – once everything looks uniform, stop mixing.

Drop the batter one teaspoonful at a time onto a cookie sheet lined with parchment paper (or wax paper).  The macarons will stick if you do not line the cookie sheet.  We used aluminum foil because we didn’t have anything else.  We succeeded but I feel that parchment paper would be a better option.  Allow the cookies to rest for 15 minutes before placing them in the oven.

Cook them in a cool oven, about 315F for 10 minutes.  Take them out of the oven and let them cool before attempting to remove them from the paper.  They are very light and fragile, and will crack or break if manipulated while warm.

This is how ours looked – we were lucky and they were smooth with a nice “foot” or the frilly/frothy edges.

Now all that remains to do is fill them – we used chocolate ganache and caramel but anything goes.  Common fillings include buttercream and jam/preserves.

Bon appetit !

Categories: English | Tags: , , | 1 Comment

Apple Cider Bourbon Cake

**Before you read on, please take a look at my note regarding English/Metric measurements.


For Christmas, my family asked me to take care of dessert – typical, given that I love sweets.  In keeping with their request, I decided to make a warm apple cider bourbon cake.  It’s a simple, moist gateau topped with an apple caramel that is best served with ice cream and perhaps a cup of tea (or a little sip of calvados…or pommeau….).

_____________________

Apple Cider Bourbon Cake

Ingredients :

SAUCE
4 cups apple cider
3/4 cups bourbon
1/2 cup dark brown sugar
1/3 cup dark corn syrup
3 tbsp cider vinegar
3 tsp cinnamon
1 to 2 tsp vanilla extract
1 cup heavy cream

CAKE
2 cups flour
1 tsp salt (if you use salted butter, you need not add the salt)
1 tsp baking powder
1/4 tsp baking soda
1 cup apple cider
3 tbsp canola oil
1/2 cup bourbon
7 tbsp butter
3/4 packed brown sugar
1 tsp vanilla extract
2 large eggs

Ice cream for serving

The timing of this cake can be a little tricky.  The sauce needs to be prepared FIRST as it constitutes a layer of the cake as it cooks.  The sauce will take at most 45 minutes, less depending on the strength of your stovetop.

FOR THE SAUCE :

In a large pot (with tall sides), combine the cider, bourbon, brown sugar, corn syrup, vinegar, cinnamon and vanilla and put over medium high heat.  I suggest that you microwave the corn syrup to make it easier to pour…since it can be very stubborn and refuse to pour out of the measuring cup.  Stir all of these ingredients together until the sugar has dissolved and the entire mixture comes to a boil.  Allow it to bubble for about 10 minutes.  Then, add the heavy cream and reduce the heat slightly to prevent the mixture from curdling or separating.  Allow the caramel to boil for roughly 25 minutes.  The sauce will thicken and the bubbles will take on a glassy sheen.

Once you have reached this point, the caramel sauce is ready and can be removed from the heat.  As it cools, it will thicken more.

FOR THE CAKE :

Preheat the oven to 350 F. Line a 9-inch round cake pan with parchment paper (I trace the pan and then cut the paper to size) and cover the sides with butter.  In a large bowl, combine the flour, salt, baking powder and baking soda (cinnamon as well for those that like a little extra spice).  In a glass measuring cup, mix the apple cider, canola oil and bourbon.

Cream the butter in the mixmaster (or if you are like me and sans mixer, use your whisk and mix until the butter is light and fluffy).  Add the brown sugar and vanilla and continue to whip the butter until it has lightened in color.  Beat in the eggs one at a time, making sure everything is well incorporated before adding the second egg.

Add the flour mixture with the cider mixture, alternating one with the other until it has been completely mixed in.  You will want to turn the mixmaster to it’s slowest speed to avoid a flour cloud.  If using a whisk, simply stir, do not whip, for best results.

TASTE.  If the batter doesn’t taste good, the cake won’t either.  If you like more bourbon, this is the time to add it.  I often put more in than I have noted above (but not much !) as the alcohol cooks off in the stove.  The same goes for cinnamon and vanilla.

Spread 2/3 of the batter in the prepared cake pan.  Drizzle in a circular motion, moving from the center of the cake outwards, the caramel mixture that was made earlier.  You made need to reheat it – do so over the stove on a low setting to avoid separation.  IF THE CARAMEL SEPARATES – have no fear !  It will taste just as good – simply make sure you mix it well before serving.  In any case, once the batter has been covered with a layer of caramel, put the remaining third of batter on top, being careful not to blend the three distinct layers together.

The cake pan will be very full, so I often place the cake pan on top of a cookie sheet just in case it overflows…this way you avoid a big mess in the oven.  The cake will cook for about 40 minutes or until springy to the touch (and a lovely golden brown color on top).  Let cool for 10 minutes in the pan before running a knife around the edge and inverting the cake onto a cooling rack.  When ready to “ice” and serve, remove the parchment paper and place on a platter (I used a cake stand but I often just use a plate).  Warm the remaining caramel and pour 1/2 over the top of the cake.

To serve, cut cake and pair with a scoop (or more…) of vanilla ice cream.  Pour a spoonful of the remaining caramel sauce over the cake and ice cream and enjoy !

Bon appétit !

Categories: English | Tags: , , , | Leave a comment

Blog at WordPress.com.