Posts Tagged With: homemade

Onion Oregano Bread

IMG_9136

While at school, I think I earned the reputation of being the breadmaker.  For various events, I was always bringing (or offering to bring) homemade bread, simply because it’s something that 1) I miss a lot when at school and 2) I truly enjoy making.  Yes, it takes a long time.  I am aware of no-knead recipes and shortcuts, but I think the best part about bread is the process itself: MANUAL LABOR.  ELBOW GREASE.  Those are just whiny words for KINESTHETIC THERAPY.  (See, when I put it like that, the ordeal adopts a medical sound.  I could probably open a bakery an employ anyone who needs to vent frustrations and just have them knead my bread all.day.long.  Brilliant business model, no ?)

In any case, while home for winter break, I noted this recipe for Onion Oregano bread (from Bon Appétit, 2005) thinking it sounded tasty and would use two ingredients rarely lacking in my pantry: oregano and onions.  The original calls for fresh oregano but I used dried to great effect.  However, as summer is upon us, those with access to an herb garden should go pick a nice handful of oregano to use with this recipe – the flavor will be fresher, more intense, and a nice compliment to a grilled meal.

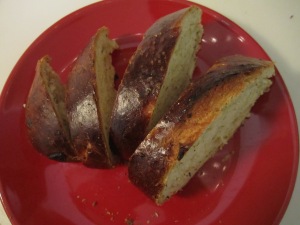
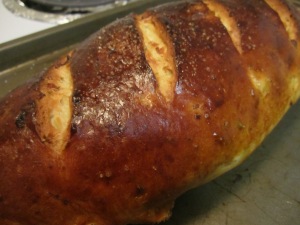
I left mine in a hot oven for a smidge too long, as the color is very dark.  Ideally, you want to lower the temperature of the oven just as the outside begins to brown so that you don’t have a charred crust and a doughy interior.  Lucky for me, the inside was perfectly cooked – just the outside was a little too dark for my liking.

Ingredients :

2 tbsp olive oil
1/2 cup chopped onion
1 1/2 cups warm water (105-115F)
1 envelope active dry yeast (2 1/4 tsp)
1 tsp sugar or honey
4 1/2 cups flour
2 1/2 tsp sa;t
1/4 cup chopped, fresh oregano
1 egg, beaten with 1 tbsp H2O
Directions :

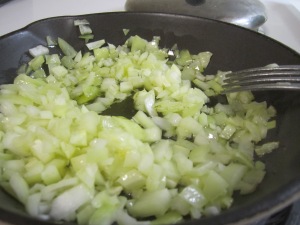
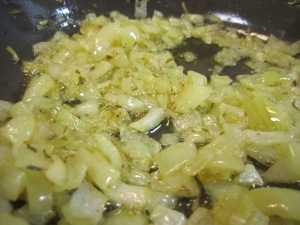
Heat the olive oil in a heavy, small skillet over medium heat.  Add the chopped onion, sautéing until translucent.  This will only take about 5 minutes, but you are welcome to cook them longer.  I love caramelized onions, and I think this bread would be great if it called for an entire cup of onion, caramelized.  Season lightly with salt and pepper.  Remove from heat and let cool.

IMG_9093


IMG_9108

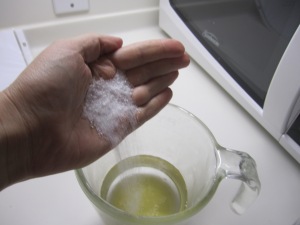
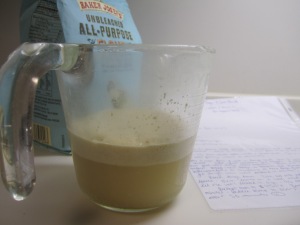
In another bowl, pour 1 1/2 cups warm water.  In order to warm the liquid properly, I measure it then microwave it for about 45 seconds.  Then, I stick my index finger in the water.  If I burn myself, it’s too hot and must cool.  If the temperature is pleasantly warm – it’s go time.  If it’s still just lukewarm, microwave it again (in smaller increments).  Of course, if you possess a kitchen thermometer, then just use that.  🙂  The water has to be a comfortable temperature for a few reasons, the most important of whihc being that yeast will die if the water is too hot.  You will become a yeast killer if you throw these little dormant bacteria into water above a certain temperature.  If you murder the yeast, their revenge will be sweet – your bread will not rise.  However, if you find a good temperature, the little yeasties wake up and, like any organism, begin to feed.  This is why to the water mixture, you add 2 1/2 tsp of sugar or honey – that is the nourishment we, the baker, provide for the yeast, the workhorse of the breadmaking operation.  Once you’ve combined the water and sugar, and stirred until dissolved, add your yeast and stir a bit.  Then, let the mixture sit and watch what happens:  the yeast begin to eat and release waste.  That waste ?  It’s what makes bread rise.  Might be a little strange to think about, but breadmaking relies on yeast farts.  If you smell the measuring cup while it’s proofing – a word the might as well be missing the “r” as poofing is a more accurate term – you’ll notice a distinct odor.  That’s the combination of air and alcohol made by the yeast as they devour the sugar we gave them.

IMG_9095 IMG_9103

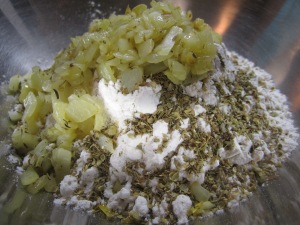
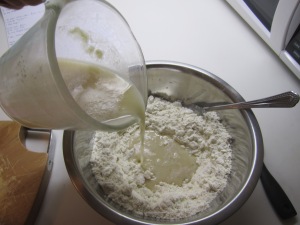
But this is just the beginning.  While that yeast is enjoying itself, mix together 4 cups of flour and the 2 1/2 tsp salt in a large bowl.  Stir in the onions and any oil remaining in the pan – there should be a little and if there isn’t, I’d add a slug of oil to the dough.  Grab your poofy yeast, give it a quick stir, and pour it into the flour mixture.  Add oregano and mix well.

IMG_9109 IMG_9115

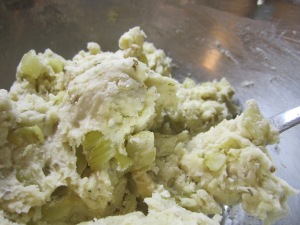
Knead briefly in bowl, just until everything comes together, then turn out onto a well floured surface (this is what the remaining 1/2 cup flour is for).  Knead until dough it smooth and elastic, adding more flour by tablespoonfuls as necessary to keep dough from sticking – about 10 minutes of kneading.  Kneading is essential to bread because it allows for the creation of gluten networks.  Gluten, found in flour, is responsible for creating the structure of bread.  Kneading rearranges the proteins in gluten (glutenin and gliaden – fancy little things), creating a setup that traps the gas released by the yeast, allowing bread to rise and contributing to its fluffy texture when baking.  There used to be a hysterical youtube video about this but I can’t find it anymore…it actually animated gluten.

IMG_9118 IMG_9119

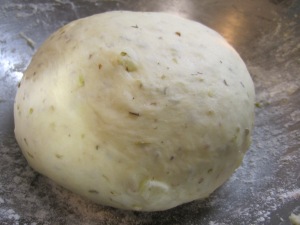
In any case, once you’ve kneaded the bread to a silky consistency, shape it into a ball and place it in an oiled bowl.  Let rise, covered for about 1 hour or until doubled in size.  (I usually went to class while bread was rising.  Made the time go by faster.)

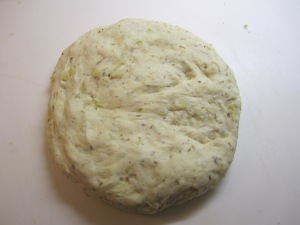
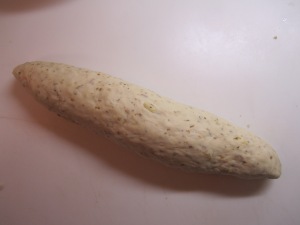
Once risen, punch it down.  Ka-pow !  Turn out onto work surface (again) and divide into two even lumps.  Working with these, first stretch them into a circle.  Fold the top two corners down, making a triangle shape.  Roll the tip of the triangle towards you until the bread resembles a baguette shape. Roll to finish the seam.  Place both loaves on a well oiled cookie sheet, cover with a towel and let rise again until just about doubled in size – it should take about 45 minutes.  During this time, preheat the oven to 450F and add a bainmarie if you feel like it (essentially fill a brownie pan with a low level of water and place in the oven while it preheats.  It will create steam and crisp the outside of the bread).

IMG_9124 IMG_9126

Brush the tops of the loaves with the egg and water mixture. Using a serrated knife, make three or four quick cuts in the  top of the loaves – this will help when the bread expands.

Bake the bread for 10 minutes at this high temperature before reducing to 350F.  Bake until golden brown and sounds hollow when tapped, about 30 minutes.

IMG_9131

Cut and serve with dinner (or butter) and enjoy !  Bon appétit 🙂

Categories: English | Tags: , , , , , , , | Leave a comment

Homemade Pretzels (with rosemary and sea salt)

A few nights ago, we decided to continue our trend of hosting little fetes with a theme.  This time, we decided to head to Germany and embrace Oktoberfest (deemed “Oktobeerfest” by my oh so clever roommate) by dedicating an evening to drinking songs, pretzels, and various types of beer. (…joyeux enfants de la Bourgogne…)

The premise was simple : come prepared with EITHER food, beer, or a drinking song and you are welcome to our home.  My contribution, as I don’t know much about beer, was to make soft pretzels…

I will admit, I’d never made these before.  I didn’t really know how to fold a pretzel or the process by which pretzels are created.  Bread – I can do.  Pretzels ?  The seemed so…beyond my reach.  But that has never stopped me in the past, so I said I’d make pretzels and pretzels I made (à la “so it is written, so it shall be.”  I’m currently writing a theology paper.  Can you tell ?)

In any case, I decided to try two different types : one with rosemary and the other plain with sea salt – just like at the fair.  Both were remarkably simple to concoct and the only slightly intimidating portion was the baking soda bath – I’ve never boiled bread dough before, but it was surprisingly simple and stress-free.   Needless to say, my trepidation about making a new food was unfounded, as everyone devoured these pretzels like it was their job – literally, there were NONE left at the end of the night.  I served mine with mustard (and beer…), but for those who don’t enjoy mustard as much as this little dijonnaise (ben, fausse dijonnaise mais c’est pas important), cheese sauce is also welcome.

Guten Appetit !

For the plain dough :

1 tsp yeast
1 tbsp brown sugar
3 cups flour
1 tsp salt
1 cup warm milk (about 50 seconds in the microwave)

For the rosemary dough :

1 1/2 cups warm water
2 tbsp brown sugar
2 1/4 tsp yeast
1 tbsp olive oil
4 1/2 cups flour (potentially more)
2 tbsp rosemary

The procedure is the same for both of the dough varieties – I’ll probably intermix the photos but I promise, the process is the same.  Start by mixing the dry ingredients together.  Depending on the kind of yeast (ex active dry or rapid rise) you use, you can just mix it right in with the flour.  If you are unsure, you can mix the sugar, warm liquid, salt and yeast together in another container and let it proof for about 10 minutes or until nice and foamy.  I did NOT do this because I’m lazy and everything worked out just fine.

Make a nice little crater in the flour mixture and pour the milk in and oil in to the moat.

Stir together – I jumped right in and used my hands but if you have an electric mixer, that’s fine too.  If using an electric mixer, add flour until the dough naturally forms into a ball.  If using your hands and good ole fashioned elbow grease, add flour until you feel you can knead it on a countertop.

Turn out onto a floured surface and knead for about 10 minutes or until the dough is nice and smooth and feel like (I kid you not) a baby’s bottom.


Place in a large, well-oiled bowl and let rise (covered) for 1 hour.

When doubled in size, turn the dough out onto a floured surface and knead a little bit to deflate. Shape into a log and divide into 7 (sea salt) or 8 (rosemary) even pieces.  I just used a sharp knife and eyeballed the sizes.  Cut with conviction !

Rolling the smaller pieces into dough can be a little challenging.  I made a video (!) but it’s sideways…and I don’t know how to turn it.  Basically, take the piece of dough and roll it between your hands until it starts to form a cylindrical shape.  Then, grasping both ends, spin it like a jumprope, pulling to lengthen.  Before you know it, you’ll have a nicely shaped cylinder.

You can even out the shape on the countertop, as you want them to be about the same thickness and to measure just overa foot – these will make a nicely sized pretzel.


Let the dough rest for about 10 minutes in this shape before reworking into pretzel form.

Roll slightly on the counter before turning up the two ends to make a U-shape.  Cross these two ends over one another, twisting once.

Secure at the bottom of the U-bend, pressing gently but not too hard – we want to keep as much air in the dough as possible.  Let sit on the counter and prepare a large cookie sheet (lined with parchment paper OR well-oiled) for baking.

Then comes the chemistry lesson.  Pretzels gain their unique flavor due to a special ritual completed before baking : a lye bath.  Lye is a VERY strong base than can cause burning of the skin, so I balked a little when I discovered this fact.  However, lucky for us, a common ingredient on bakers’ shelves is ALSO a fairly strong base…BAKING SODA !  Instead of using lye, I made a solution of baking soda and water.  I used a ratio of 4 tablespoons soda to 2 cups of water and the flavor of the pretzel crust wasn’t sharp, yet still retained enough bite to be called a pretzel.

Mix together the water and the soda in a pot on the stovetop and bring to a boil.  Using a spatula, scoop up the soft pretzel and immerse in the soda bath for about 10 seconds. Remove promptly, shake a little, and place on the baking sheet.  Sprinkle with salt/rosemary.  Repeat for all the pretzels.


Place in a 425F oven for about 15 minutes or until the pretzels are a bronze color – these will be soft pretzels, so you won’t be able to tap them and know that they are done.  I found the best way to be sure was to sample them… 😉

Serve with some Dijon mustard (nice and grainy) or cheese sauce and a stein of cold beer – I recommend Grimbergen amber ale.  Delicious.

Happy fall !

Categories: English | Tags: , , , , , , , , | 2 Comments

Lemon Meringue Tart (Tarte au citron meringuée)

Passing a recipe from one person to another is a practice that deserves some attention.  Like getting a letter, a recipe reminds you of something – a memory, a friend, a moment – and today I made a little dessert that my darling souris taught me to make.  Though I’ve made it since our last encounter, I think that handwritten recipe page complete with images of dancing lemons will always make me smile.  What’s more – I’ve not yet failed this recipe, which at first glance seems a wee bit complicated.

When in France (oh so many moons ago…), I NEVER ate lemon tarts (tarte au citron for those who have visited ze land of wine and cheese).  I didn’t like the taste or the texture, finding it to be far too bitter a choice when situated next to the oh so sweet and visually appealing tarte aux fraises…creme patissière…miam….but I digress.

When Pauline decided, in a spur of the moment frenzy of Sunday afternoon decisions, to prepare this delicious creation, I was skeptical…lemons….meringue….together ?!  It was, however, warm and creamy, just sweet enough to tingle the tastebuds without leaving them thick and mute.  I think it’s safe to say I fell in love with the shortbread crust, lemon curd, and delicate floufs (yes, floufs – what would YOU call them ?) of meringue topping.

And so it happened that I purchased lemons.  Eggs.  Butter.  A 10 pound bag of sugar (it was on sale…).   Oh.  And I brought a champion whisk from home with me to school – all in preparation for the serious whisking needed to make this treat.

Without further ado, I present to you Pauline’s “tarte au citron meringuée” or lemon meringue tart.

For the crust :

1 1/2 cups flour
1 cup sugar
7 tbsp butter (almost a stick !)
1 egg

Preheat oven to 375F.  Combine the flour and butter and sugar in a bowl.  Mix together either with a fork or with your hands (I start with a fork and move to hand kneading…) until crumbly.

Add the egg and continue to mix until very malleable – it ought to look like dough, very easy to pinch.

Press into the bottom of a tart pan (or a cake pan – I used a 9” round cake pan lined in tin foil) until evenly distributed.  Score with a fork to prevent air bubbles while cooking.

Place pan in oven and cook until golden brown – about 15 minutes.  You will probably smell the crust and know then that it is done cooking.  Let cool in pan.

For the curd :

Juice of 4 lemons (about 1/2 cup)
1/2 cup granulated sugar
7 tbsp butter (almost a stick !)
2 egg yolks + 1 whole egg
2 tbsp flour

Juice ALL OF THOSE LEMONS.

(I had a difficult time…but ended up with just enough juice.) In a pot, combine the lemon juice and half the sugar (1/4 cup) and whisk over medium heat.

Let this come to a rolling boil for a few minutes (this is to make sure the sugar is well-dissolved into the lemon juice).  In a separate bowl, whisk together the egg, egg yolks, flour and sugar.  Make sure this is nice and light – don’t be afraid to put some elbow grease into the situation !

Once the lemon juice is ready (and so is the egg yolk mixture) temper the yolks by pouring half the boiling sugar combination into the egg yolks and whisking fiercely.  Then, pour the NEW egg mix into the leftover lemon/sugar pan.  Whisk AGAIN and place back on the heat (reduce the heat though – down to low ought to be fine).

I know this is a lot of work, but whisk whisk whisk so that clumps of cooked egg yolk don’t form – it’s just not elegant – and you end up with a NICE, SMOOTH, VELVETY custard.  🙂  Once the curd has thickened (this will happen quickly), remove from heat and stir in the butter 1 tablespoon at a time.

Pour the finished product into the pie crust and use the back of a spoon to flatten.  Let glaze while you prepare the meringue topping.

For the meringue :

2 egg whites (leftover from the curd)
1/2 cup sugar
Pinch of salt or cream of tartar

Place the whites, salt, and/or cream of tartar in a clean bowl.  With a CLEAN whisk (any impurities will make it very difficult to whip the egg whites), beat those egg whites until they hold peaks all on their own – probably the “soft peaks” stage – I think they look like clouds.

Add the sugar and continue to whisk until the egg white mixture thickens – your arm will probably be quite exhausted by the end of this experience if you don’t use an electric mixer (like me) but I promise, it’s worth it in the end…

Set the oven to broil.  When it is the consistency of marshmallow fluff, pour it onto the lemon curd and smooth it out with the back of a spoon.

I like to make little peaks on top – these will broil nicely – and I just stick the back of the spoon on top of the meringue and lift up gently – you’ll get a lovely little flouf.

Place the tart into the oven and broil for about 3 minutes – be sure to watch the tart because it has a tendency to burn (!) and that wouldn’t be fun…or delicious.  Use your nose – it will smell like toasted marshmallow in the house when the tart is done.

Let cool and serve !

Bon appétit ! 🙂

Categories: English | Tags: , , , , , , | Leave a comment

Nora’s Ephron Peach Pie

I know, it’s a funny title – but that is how Mrs. William H. Hammond baptized her pie dish in the 1984 edition of “Needle the Cook,” a recipe book released by the New Canaan Sewing Group.  I’m not entirely sure how we came to possess this (well-worn and homemade) booklet of local recipes…but that’s part of the charm.  Probably typed-up on a typewriter, the book features two colors – blue and white – as well as the recurring image of a bee sewing…it’s a bit bizarre but has some gems that the dames of New Canaan wanted to pass on to their progeny.  It has, evidently, worked.  🙂

This peach pie has been a family favorite for years.  Normally, my mother makes it and I eat it.  Ah, the life…

However, it seems like I’ve “come of age” and it is my turn to prepare the pie.  Rather than being filled to the brim with fruit and covered with a sheet of dough, this pie features a custard filling and an open top.  Lots of peaches are (of course) welcome, but too many will change the nature of the custard and the filling.

The crust is rich, the custard is creamy, and the peaches HAVE TO BE FRESH.  In my town, they are rolling in much earlier than normal – which just means more peach pies for me.  🙂

For the crust : 

1 1/4 cups flour
1/2 tsp salt
1/2 cup butter
2 tbsp sour cream

Preheat oven to 425F.  Put all the ingredients in a Cuisinart and mix until a ball forms.

If you don’t have this fancy machine, use your fingers  OR a fork and mix until the dough is uniform and easily malleable – rather like sugar cookie dough.

Grease the pie pan.  Press this into the BUTTERED pie pan until you have an even layer all the way around.

Place in oven and bake for about 10 minutes or until just starting to brown.  Remove and let cool.  Reduce the oven temperature to 350F.


For the filling :

3 egg yolks
1 cup sugar
1 tbsp flour
1/2 cup sour cream

Beat all ingredients together until frothy and yellow and smooth.  I put my mixture back in the Cuisinart, but this can easily be done with a whisk.  Peel and slice five small peaches (three large ones) and place them in the pie dish.

This is an opportunity to be artistic…and normally, I am…but when you have an aunt hovering in and out of the kitchen, a mom checking on certain elements of the pie, an uncle and a father attempting to grill (but not cooking the chicken enough) and an adorable little grandmother who is repeatedly asking you what day it is…you just want to finish the pie and get out of the kitchen, seeking refuge in the piano room…or is that just me ?

Anyway, place the peaches in the pie pan, arranged as you see fit.  Pour the egg mixture (eg the custard) on top of the peaches.  I didn’t have any with me…but I think that sprinkling a little nutmeg overtop of the pie would be super delicious.  Maybe a little cinnamon, too.

Bake for about 35-40 minutes or until the custard is set.  You’ll know when the custard is cooked when you can touch it with your finger and a small amount will come off OR when you shake the pie and the center will jiggle rather like pudding but not actually pour/spill.

If your pie crust starts to burn (depending on the strength of your oven), cover the pie with tinfoil.

I would serve this pie warm rather than cold.  This way, the custard is so much more creamy and comforting.  It’s a great summer dish best enjoyed outside on a picnic table (or in front of the Olympics…) It’s also fantastic the next day….I just ate the leftovers.  Miam miam !

Bon appétit !

Categories: English | Tags: , , , , | 2 Comments

Create a free website or blog at WordPress.com.